Learn How To Draw A Walrus Quickly
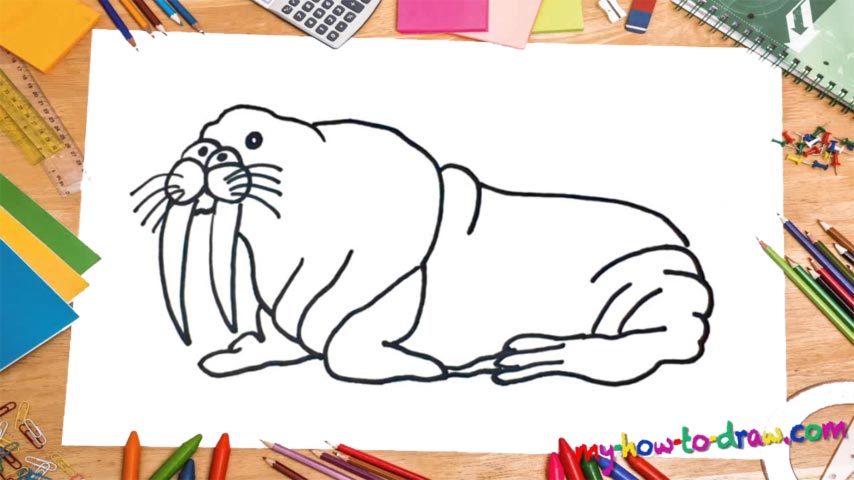
The top of the head comes first in this video (00 min 08 sec). The nostrils sit right below it (00 min 7 sec). See those ovals in the lower corner? They are there to hold the tusks (00 min 30 sec). The huge daggers are the next step in this how to draw a Walrus tutorial (00 min 40 sec). They look like big icicles hanging out from the face.
The mammal has four whiskers on each side (00 min 55 sec). Put them in before moving to the other parts of this drawing. And don’t forget about the eye (01 min 04 sec). Ok, now we get to the body. It consists of a series of “folds” sitting on top of each other. I recommend handling the front part first and only then moving to the right.
Begin with a series of lines covering the bottom (01 min 12 sec). Once the folds are in, connect them to the top of the head to complete the shape. The legs/fins are very simple (01 min 38 sec). They look like opposites of each other. Alright, the final stage of this how to draw a Walrus tutorial awaits (02 min 04 sec). This time around, start in the upper corner. Add the rear leg, and that’s it (02 min 23 sec)!
Before you learn how to draw A Walrus, did you know?
These big, strong, and slow marine mammals are one of the finest creatures in the North Pole and the entire Arctic Ocean. Even if you’ve never seen a walrus in real life, those tusks and whiskers – their trademark features – will instantly let you know what (or, rather, who) you’re dealing with.
By the way, did you know that grown-up males usually weigh around 2K kilograms? Yep, we told you that they are pretty bulky! For the indigenous nations of the Arctic, the walrus has always been a great source of vital resources. Back in the 19th century, our kind hunted these animals for their meat, skin, tusks, and more.