Learn How To Draw A Skeleton Quickly
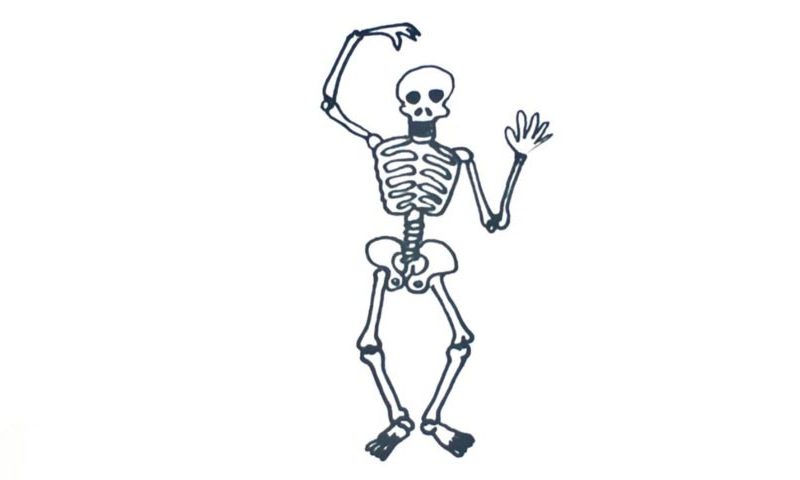
This is a very basic drawing, obviously, but it looks awesome and you can see all the major parts are there. The head, or, rather, the skull is first on the menu in this how to draw a Skeleton tutorial (00 min 06 sec). It’s pretty tiny and comes with two big black circles for the eyes, two tinier holes for the nostrils, and a black “box” at the bottom for the mouth (00 min 30 sec).
The skull looks a bit like a light bulb, doesn’t it? The chest is the next step (00 min 45 sec). It consists of two identical parts. Each represents a number of ribs that hold the entire body together. If you’re happy with this stage, move on to the spine (01 min 20 sec). You’ll need a series of tiny ovals on top of each other for the spine. The pelvis follows (01 min 32 sec). It also consists of two identical parts sitting next to each other.
The legs are the next step in this how to draw a Skeleton tutorial (01 min 50 sec). They are comprised of two long and skinny bones and the feet at the very bottom. The final stop is, of course, the hands (02 min 50 sec). Again: two long and thin bones with a palm at the end. There’s nothing hard about these shapes and curves.
Before you learn how to draw A Skeleton, did you know?
The majority of the living creatures on planet Earth have a skeleton. It’s the foundation that all the other vital “blocks” are built on. The bones are the sturdiest parts of our bodies and you’ll have to spend weeks, if not months to rehabilitate after you break an important bone.
The horror movies really love to use skeletons to give us a good scare. The video games breathe life into these “dummies” and make them fight the player. From an anatomical point of view, the skeleton is a very exciting and complicated thing. If you’re planning on becoming a biologist or a medic, you’ll have to learn everything about it by heart.
