Learn How To Draw A Seagull Quickly
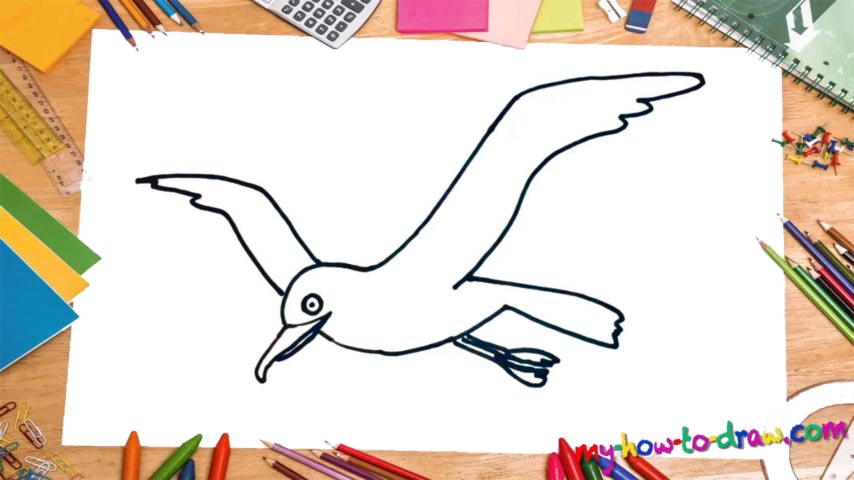
As always with the birds, we begin this tutorial by adding the beak first (00 min 08 sec). It consists of two parts: a long shape with a “hook” at the end and a tiny line below it. To cover the top of the head, use a simple curve just like you see in the video (00 min 25 sec). The next step of this how to draw a Seagull tutorial is the huge wing to the right (00 min 32 sec).
The shape is very simple; yet, it looks like the real thing. The straight vertical and horizontal lines will get most of the job done. For the tip of the wing, put a series of wavy lines on top of each other. It might seem too “skinny”, but that’s exactly what we’re going for. Go back to the beak and cover the bottom of the drawing (00 min 52 sec).
This step of the how to draw a Seagull tutorial includes the tail in the lower right corner. There’s nothing to it. The wing on the left looks significantly smaller because of the angle, but it’s essentially the same (01 min 06 sec). The foot in the back is the final part (01 min 20 sec).
Before you learn how to draw A Seagull, did you know?
These seabirds are usually grey or white and, just like their name suggests, seagulls like to hang around water. The black spots on the head and the wings give these birds a very majestic look. This might come as a shock to some, but they are carnivores and prey on live food (the list includes tiny fish, crabs, and other marine organisms) and/or scavenge.
Thanks to the huge jaws, seagulls are capable of swallowing large prey in a matter of seconds, which is vital for their survival. Usually, they never go too far into the land and prefer to eat and sleep on the shores. The gulls that have beautiful white heads live the longest (up to 49 years). For us, the humans, they pose no threat and are much lower in the food chain.