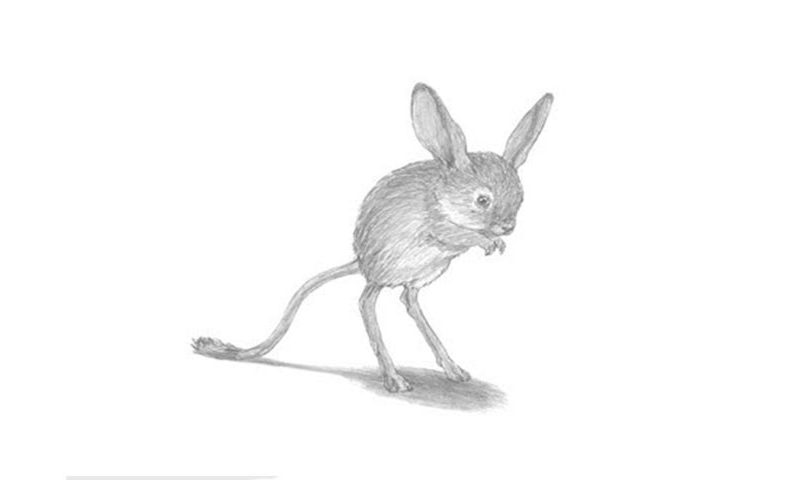
Learn How To Draw A Jerboa (Long-Eared) Quickly
To make things easier for ourselves, we start with two circles sitting on top of each other (00 min 24 sec). They will help us keep the proportions of the body and the head right. Once those are in place, move on to the next step of this how to draw A Jerboa (Long-Eared) tutorial – the guides for the head and the ears (01 min 08 sec).
You don’t need to be accurate with them: just put them in the right places. If you’re happy with the upper half, move back to the bottom and add two super thin vertical lines for the legs (02 min 07 sec). The tiny hands and the long tail follow (02 min 30 sec). Ok, the light-stroke guides are done. The facial features come next.
This part of the how to draw a Jerboa (Long-Eared) lesson is pretty easy (02 min 58 sec). The eye sits in the middle. The ears are very similar to each other, but we see more of the left one (05 min 12 sec). For the legs, the hands, and the body, all you’ll have to do is go over the guides with harder strokes (06 min 12 sec). Coloring is the final step (09 min 45 sec).
Before you learn how to draw A Jerboa (Long-Eared), did you know?
These funny little guys only live for 3 to 6 years, but they’re quite active and manage to accomplish a lot. The smallest jerboa can be as light as 57 grams, making it one of the most exciting rodents on planet Earth. At the same time, they are incredibly fast and can run at a speed of 24 kilometers per hour, which for a creature this small is an outstanding result.
Living in hot deserts, jerboas had to adapt to the harsh environment and have developed a “survival’s skill set” that allows them not only to stay alive but also to grow in numbers. Finally, these brutes have excellent hearing (yep, that’s what those huge ears are for) so that they can feel the predators coming and have time to hide in underground shelters.
