Learn How To Draw A Hummingbird Quickly
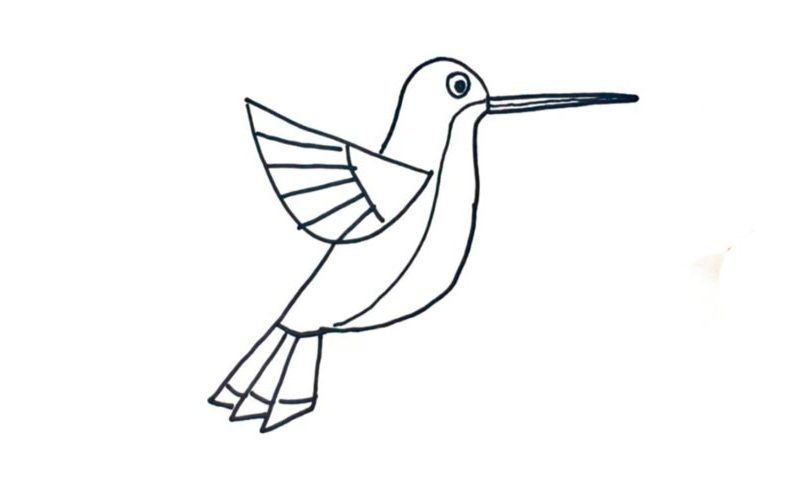
No, we won’t begin with the beak. Let’s put the head in first (00 min 06 sec). Use two simple lines to cover the left and the right sides. Then, go ahead and add the super-long beak (00 min 14 sec). It should look like a stick that’s getting thinner the closer you get to the tip. You’ll need three straight horizontal lines to complete this stage of the how to draw a Hummingbird tutorial.
The big eye follows (00 min 28 sec). To shape the body, keep up with the video guide and draw a curvy line. Connect it to the beak, just like you see in my example (00 min 40 sec). The gorgeous wing is the next step (00 min 47 sec). A half-moon with straight lines in the left corner – that’s all there is to it.
The tail is the final part of this how to draw a Hummingbird tutorial (01 min 02 sec). Basically, it consists of three similar shapes sitting next to each other. Begin in the left corner and make your way to the right. Ok, we’re officially done now!
Before you learn how to draw A Hummingbird, did you know?
This family of birds lives in the Americas and has been around for ages. Most species are included in the list of the tiniest birds and measure 7-13 cm in length, give or take. As for the smallest bird species living on planet Earth right now, the hummingbirds are the obvious winners. They weigh just 2 g and are 5 cm long. And they look cute, too!
We gave them that name because of the sound their wings make. Even though the frequency is quite high, we can still hear it. The smallest members of the family can flip their wings 80 times per second! Plus, they are faster than a regular train and can fly at a speed of 54 kilometers per hour. I bet you didn’t know this about the hummingbirds.
