Learn How To Draw A Harmonica Quickly
This lesson consists mainly of straight lines. Together, they form a rather simple 3D model that looks good on the paper. Start with a horizontal line to cover the front (00 min 06 sec). You’ll need a rectangle for the intro to this how to draw a Harmonica tutorial. Once it’s in place, get to the right side (00 min 23 sec).
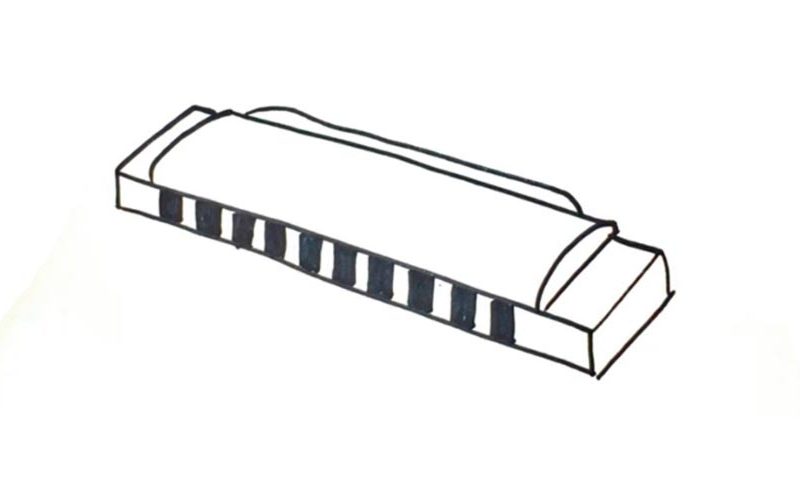
Moving to the top of the instrument, create a more “curvy” shape like the one you see in the video (00 min 34 sec). To complete the foundation, use two tiny lines (00 min 51 sec). Ok, we’re almost done, dear friends! The harmonica already looks like the real thing, but we’ve still got some ground to cover. See that basic curve in the upper corner (00 min 57)?
Add it first before moving to the final step of this how to draw a Harmonica tutorial. What you’ll need to do to make the drawing look great is create a series of black rectangles in the front (01 min 05 sec). Overall, you’ll need 10 of those.
Before you learn how to draw A Harmonica, did you know?
This is a wind instrument that can be used in the majority of musical styles and genres across the world. Jazz, blues, folk music, and, of course, country love and cherish the Harmonica for its trademark sound. There are several different types out there, including the bass, orchestral, tremolo, and other harmonicas. But let’s not get into all that here.
Basically, you need to use your lips and tongue to push air through one of the holes to produce a certain sound. By combining these sounds, you get a combination of different notes – a melody. The legendary Bob Dylan, one of the finest musicians of our time, likes this instrument and used it in some of his iconic songs. And he’s not the only one!
