Learn How To Draw A Deer Quickly
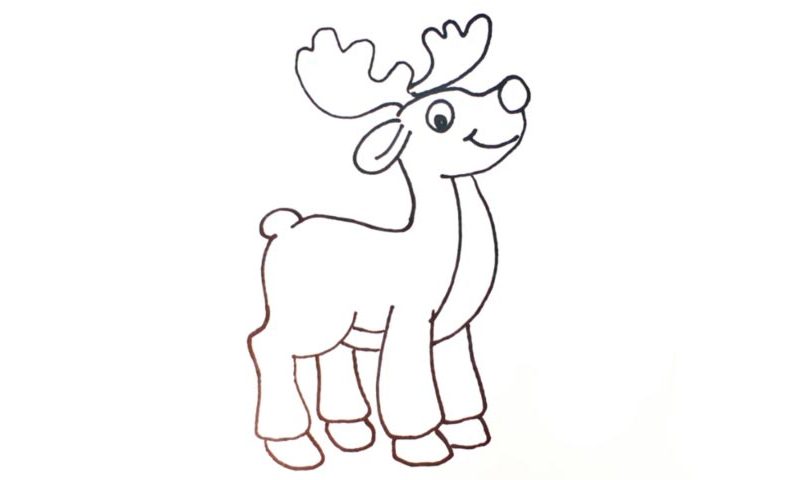
The beautiful antlers come first (00 min 08 sec). They look a lot like autumn leaves and cover the very top of the drawing. Once you’re done with the intro to this how to draw a Deer tutorial, move on to the head (00 min 33 sec). See that big circle (00 min 39 sec)? It’s the animal’s nose. For the ear on the left, you’ll need two simple lines (00 min 50 sec).
The eye and the mouth will complete the head (01 min 01 sec). The eye consists of two circles of different size. The mouth is just a primitive line right below the nose. If everything looks good, let us move on to the body (01 min 16 sec). Cover the front with two vertical curves. The legs are nice and big, with hoofs at the bottom (01 min 30 sec).
The rear left leg is one of the trickiest parts of this how to draw a Deer tutorial (02 min 01 sec). Make sure you get the curves in the front and in the back right. The rest is easy. To complete this lesson, use a nice and long curvy line to cover the animal’s back (02 min 18 sec). Don’t forget about that cute tail!
Before you learn how to draw A Deer, did you know?
Who doesn’t like deer, right? These beautiful creatures live in the forest next to us but are too shy (or, rather, afraid) to come knocking on our doors, like, say, the cats and the dogs. In North America, they are a huge part of history and you’ll find their images on emblems, flags, banners, and more. Many counties and small towns are named after them.
Unfortunately, the fact that we use their meat, skin, and antlers makes deer a target for the hunters, and their population is fading every single year. People make huge amounts of money on killing these animals, and unless somebody stops them, they will become extinct soon.
