Learn How To Draw A Clown Quickly & Easily
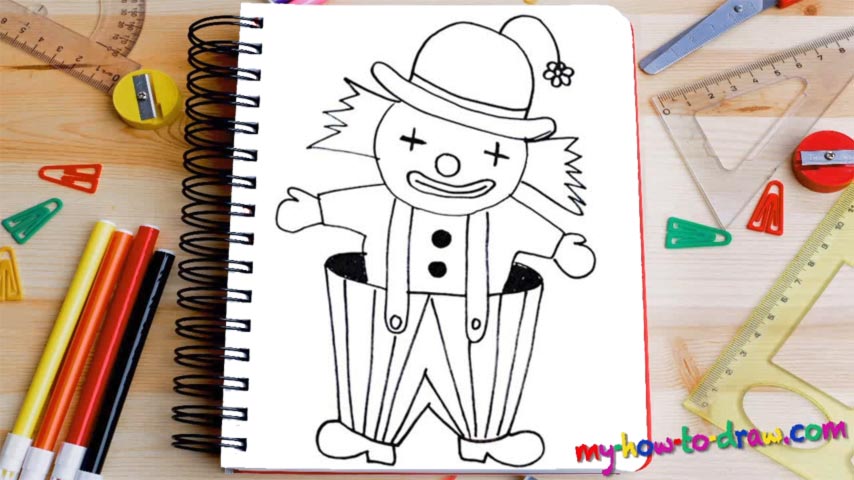
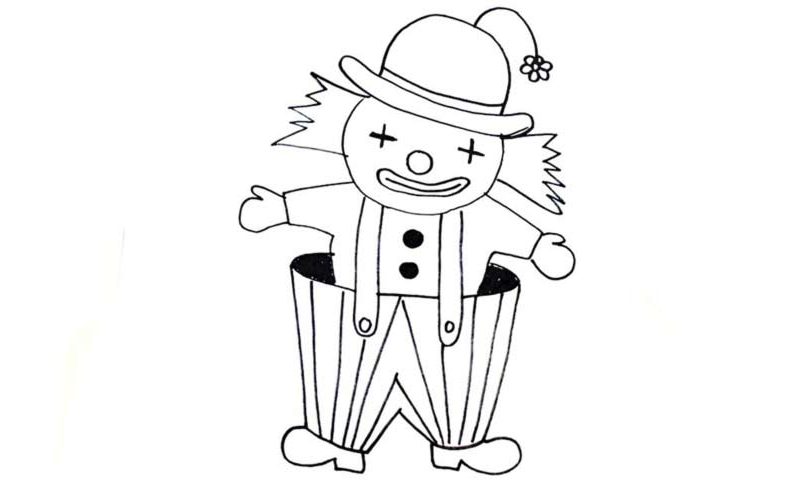
The curve that looks like a reversed letter “C” covers most of the character’s face (00 min 08 sec). The magical hat sits right above it (00 min 14 sec). it’s a pretty regular hat and won’t be a problem for you. But it’s got a cute flower on top – don’t forget about it (00 min 28 sec). And now that we’re done with the intro to this how to draw a Clown tutorial, it’s time to move on with it and take care of the facial features.
The eyes come first. It looks like they have been “crossed” by someone, which might give you nightmares (00 min 40 sec). The nose is just one simple circle. The mouth makes this clown look even creepier than before. Yes, this is one of those that give you the chills instead of cheering you up. The hair on both sides of the head is primitive and looks the same (01 min 00 sec). The body is the next step in the how to draw a Clown tutorial.
The top is very simple and the hands are covered in gloves. Plus, he has two buttons on his shirt (01 min 45 sec). As for the pants, they are extremely large, which gives him that classic clown look (01 min 55 sec). He’s got identical shoes at the bottom (02 min 07 sec). The pants have that old-school texture with stripes. This is the last thing to add to this drawing. Looks great, huh?
Before you learn how to draw A Clown, did you know?
Some people are afraid of Clowns and can’t stand them. But for the rest of us, they are pretty great and bring a holiday atmosphere into our homes. These men and women spend their entire lives perfecting the art of making the kids laugh and have a good time.
However, even though they’re associated with fun and laughter, not every single clown out there is a happy person. It’s just a part of their job, but in real life, they also have to struggle. The movie directors really love to shoot horror films featuring crazy clowns.