Learn How To Draw A Cartoon Bat For Halloween Quickly & Easily
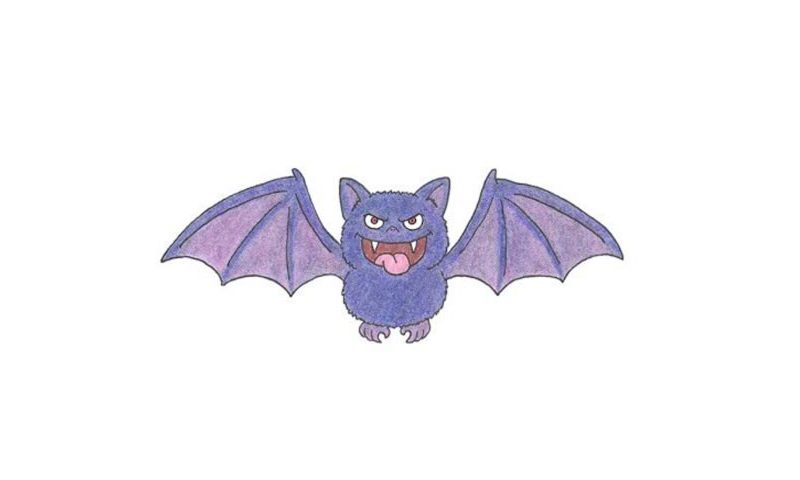
To turn this lesson into a fun experience, let’s start with the eyebrows (00 min 07 sec). Make them thick and pointy. For the eyes, you’ll need two half-ovals and tiny circles inside of them (00 min 22 sec). The nose, the next step in this how to draw A Cartoon Bat For Halloween tutorial, looks like a tiny pyramid with two dots (00 min 56 sec).
The mouth is the scariest part (01 min 07 sec). Add the top half first – it’s just a single horizontal curve. For the sides of the mouth, use two identical lines (01 min 24 sec). The scary teeth, two in total, follow (01 min 36 sec). The tongue, in turn, is pretty classic and will fit a large number of cartoon beasts (01 min 48 sec).
For the head to look realistic, you’ll need to use short strokes on the sides and the top (02 min 05 sec). The gigantic triangle-like ears will make the bat look like a cat (02 min 38 sec). To complete this how to draw A Cartoon Bat For Halloween tutorial, you’ll need a “fluffy” half-oval at the bottom (03 min 04 sec).
Each foot comes with four toes (03 min 27 sec). The identical wings are the final part (04 min 00 sec). They look like blades. Don’t forget to add those lines inside of each wing to make them look more realistic.
Before you learn how to draw A Cartoon Bat For Halloween, did you know?
Most of us learn about bats from comic books, movies, and TV series, and they’re usually always the bad guys. However, in the real world, no bat will even attack a human, unless its life is in danger. Bats can be found in dark and creepy caves far from the human populations.
By the way, did you know that these beasts are more flexible and maneuverable than birds? Yes, that’s right, and they’re also the 2nd-largest order of mammals. Overall, there are 1200+ species of bats on planet Earth. One more thing: bats prefer to live and hunt in packs, and it’s not rare to find dozens of them sleeping while hanging down from a wall in a cave.
