Learn How To Draw A Cap Quickly
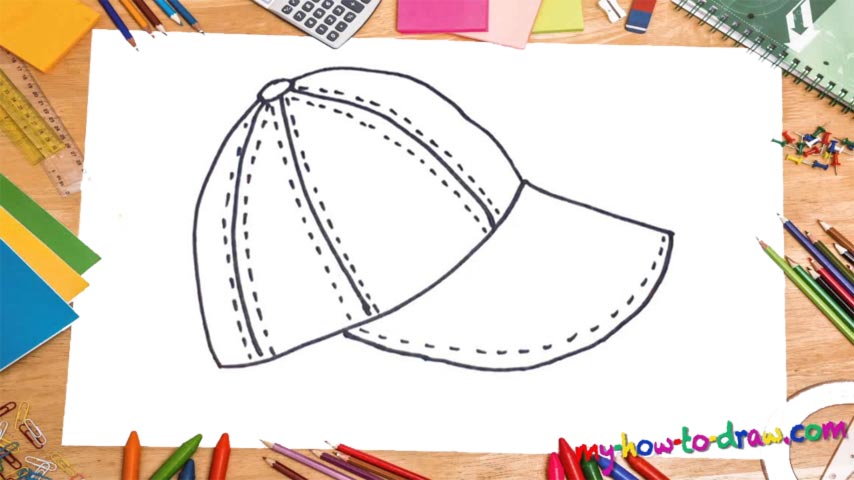
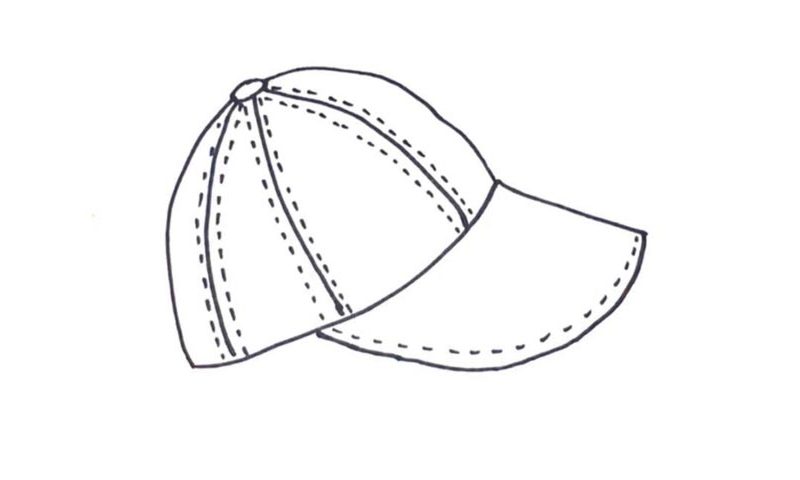
The bottom of the cap comes first (00 min 07 sec). Next, add two similar curvy lines and lock them up at the top to create some sort of a dome (00 min 11 sec). Put a tiny oval between the two lines to complete the main part of this how to draw a Cap tutorial (00 min 20 sec). Now it’s time to create three similar lines that will make it look like some sort of a fruit/vegetable.
Doesn’t it resemble a watermelon a bit? The second half of the cap, the one that goes beyond the head and covers the eyes, is the next thing we’ll work on right now (00 min 34 sec). You’ll need two lines for this step: a straight one in the upper corner, and a curvy one that almost reaches the bottom left corner of the original shape. Alright, dear friends, the how to draw a Cap tutorial is almost over!
The only thing left to do is create a series of dotted lines all over the place to make everything look even better (00 min 45 sec). There’s only one “stitch” in the front, while the three curves we added a while back have these dotted lines on both sides of them (00 min 57 sec). The final result looks like the real thing!
Before you learn how to draw A Cap, did you know?
Back in the day, only bold men used to wear Caps, but that’s not the case anymore. People of all ages, nationalities, and sex wear them in their daily routine. As you might already know, caps aren’t for anyone, and it’s just a matter of luck: you’ll either look good in them or ridiculous :).
The rappers and the entire underground scene are in love with this headgear – it is a huge part of their culture and the entire urban movement. So, if you’re a fan of caps and can’t imagine your life without one, go ahead and master this tutorial using our amazing video guide.