Learn How To Draw A Beaver Quickly
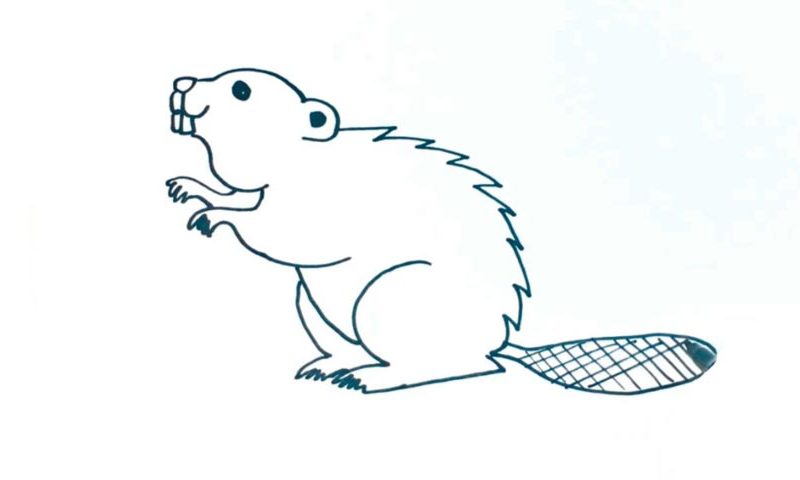
We start with the brute’s facial features – the nose, the mouth, and the eyes. The nose comes first (00 min 10 sec). It’s just a tiny oval shape. The teeth sit right below it (there are two in total) (00 min 22 sec). Ok, that’s it for the intro to this how to draw a beaver tutorial. Now let’s move on to the rest of the face. You’ll need two curvy lines to cover the top and the bottom.
These lines are very similar to each other (00 min 34 sec). Once they’re in place, add the one and only visible eye (00 min 44 sec). Color it black but leave a white dot in the middle. For the ear, you’ll need another black circle and a C-like curve (00 min 50 sec). The back of the animal covers a long, zigzag-like line (01 min 00 sec). Make sure you get the length right.
The front legs are the next step in this how to draw a Beaver tutorial (01 min 14 sec). It’s sitting on its rear legs, and they almost look the same (01 min 40 sec). The tail is the final touch (02 min 00 sec). Make it nice and long and cover it with a “grid.”
Before you learn how to draw A Beaver, did you know?
These rodents are equally cute and fast. Currently, there are two species living on our planet, and those include the Eurasian and the North-American beavers. They are great at building stuff, including canals, dams, and more. By the way, beavers are officially known as the biggest rodent on the globe after capybara. They like to stick together.
And, these brutes build several dams for a constant water flow that will allow them to move materials, food, and escape their enemies. Thirty years ago, there were +/- 60 million beavers on Earth. However, these days, they are down to 10-20% (6-12 million).
