Learn How to draw Ender Dragon – Minecraft Quickly & Easily!
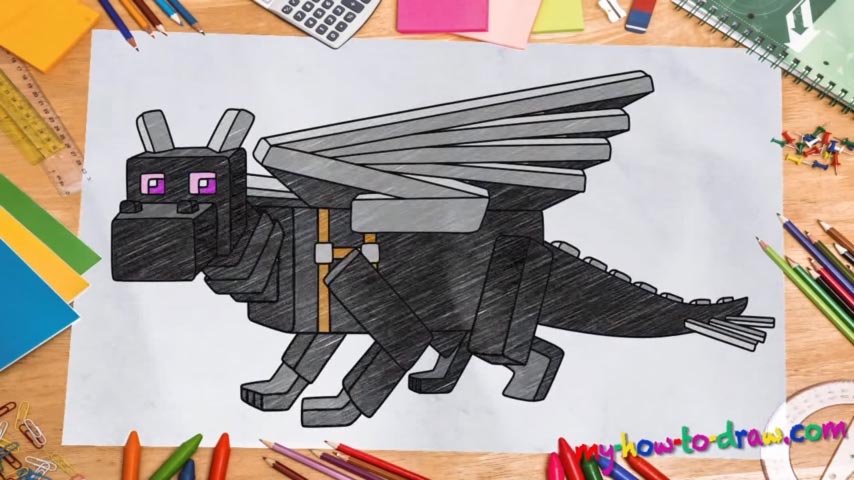
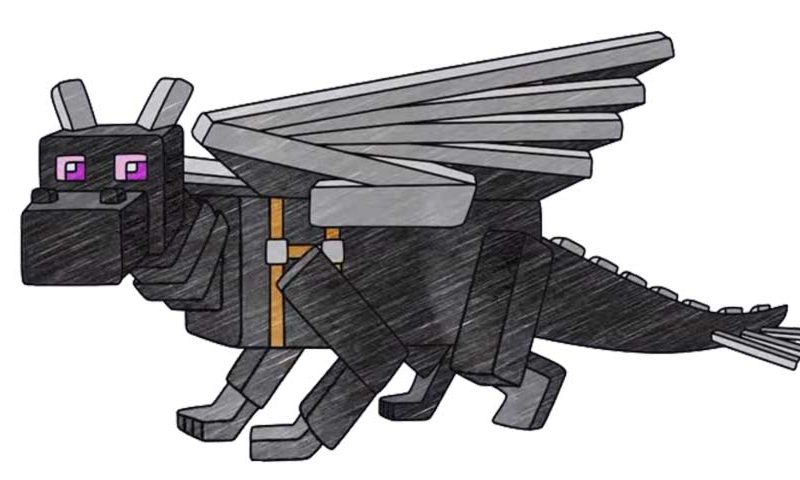
As always, put a rough sketch in before using a marker to draw the actual thing. This is quite a complicated drawing and might take you a while to finish. And that is why our how to draw Ender Dragon tutorial is so detailed. Start with the square in the left corner (00 min 41 sec). There’s another one right below it (you could call it a 3D square).
Once those are done, create the ears and move on to the body (01 min 15 sec). The tail comes next. It’s just a combination of simple lines – nothing hard about that. After that, connect the head to the body and move on to the wings (01 min 52 sec). The final step is the legs (02 min 29 sec). Those oval shapes at the bottom of the paper connected with straight lines to the body are, indeed, the future legs.
Ok, now that the intro is done with, we can get to the real fun in this how to draw Ender Dragon tutorial. Use a marker to start with the nose (03 min 29 sec). The big, square-like jaw comes next. The eyes look identical and are probably the simplest part (04 min 10 sec). Please keep in mind that Minecraft is all about rough, rectangular characters; so, don’t be surprised with the cubic shapes in this how to draw Ender Dragon guide.
If you’re happy with the face, gradually move on to the body by drawing the neck (05 min 25 sec). You could say that the legs look like those of a Lego character (06 min 07 sec). Once you’re done with all four, handle the wings (08 min 02 sec). Make sure to keep the proportions right and follow the video closely. The final step is the long, perky tail (10 min 06 sec). It might seem a bit tricky at first, but it’s really not.
Before you learn how to draw Ender Dragon – Minecraft, did you know?
This game is ridiculously popular these days, and that is why we did our tutorial – to help you guys learn how to draw Ender Dragon and have some fun with it. It’s big, scary, and can kill pretty much any player out there in the virtual world. So, don’t let it catch you off guard!