Learn How To Draw Snorlax Quickly
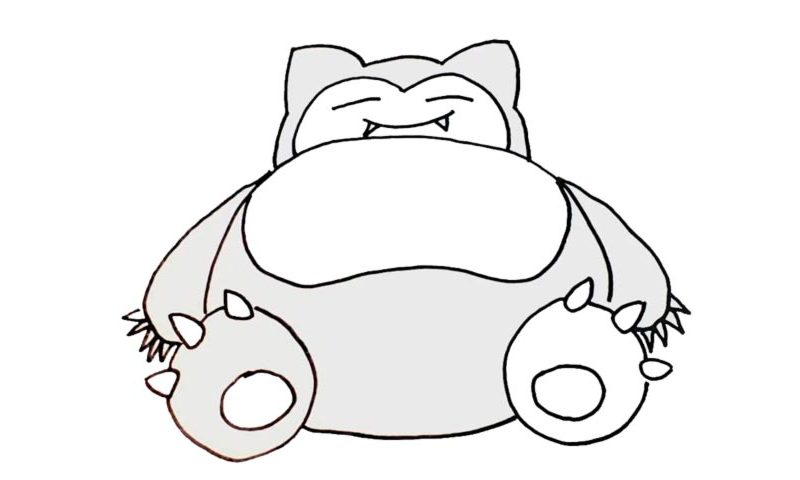
That big body plays a huge role in this drawing, and that is exactly why we’ll start from there (00 min 07 sec). The half-circle you see in the video should sit right in the middle of the paper. Next, use a curvy shape to separate the belly from the rest (00 min 20 sec). If you’re happy with everything so far, move on to the next step in this how to draw Snorlax tutorial.
Yes, I’m talking about the legs, or, rather, the feet. They look identical to each other and come with three toenails each. Add the one on the left first (00 min 37 sec). You’ll need two circles of different sizes and three sharp and pointy ovals for the toenails. Once they’re in place, add a horizontal line at the bottom to connect them to each other (01 min 32 sec).
The head is the next step in this how to draw Snorlax tutorial (01 min 48 sec). Make sure you get everything right with the curve, especially the ears. The beast’s eyes are closed (02 min 18 sec). The mouth sits right below them and you can see two teeth hanging out (02 min 23 sec). To finish this lesson, go ahead and create the hands (02 in 37 sec). They are also identical to each other, except that the left hand has 5 nails (the right one has only 4).
Before you learn how to draw Snorlax, did you know?
Even if you’re not a fan of Anime or any of the Japanese animated movies, you probably still have a general idea about the Pokemon universe. It’s taken over the entire planet, and there’s nothing you can do about that! As for Snorlax, it is a frequent guest in all kinds of merch, because the kids really love it.
AKA the Sleeping beast, this Pokemon weighs 1000+ pounds and used to be the heaviest character of the franchise for a very long time. Since the day it was introduced to the world, this beast has gained a huge fan base around the globe.
