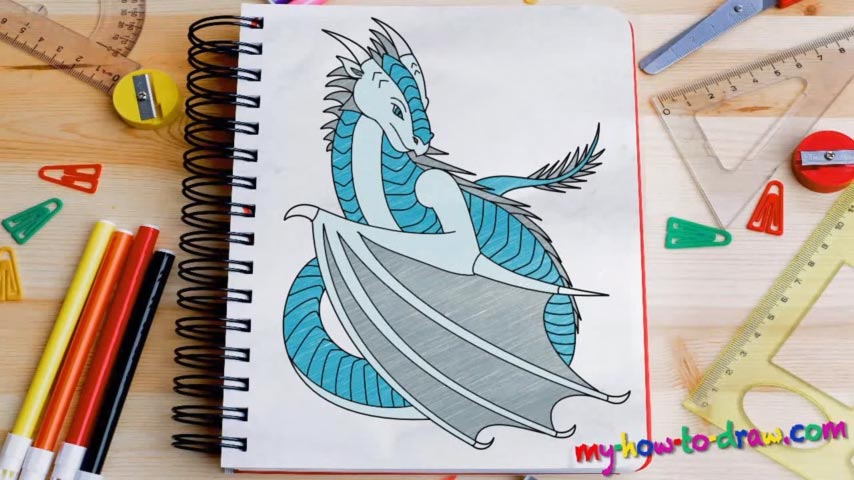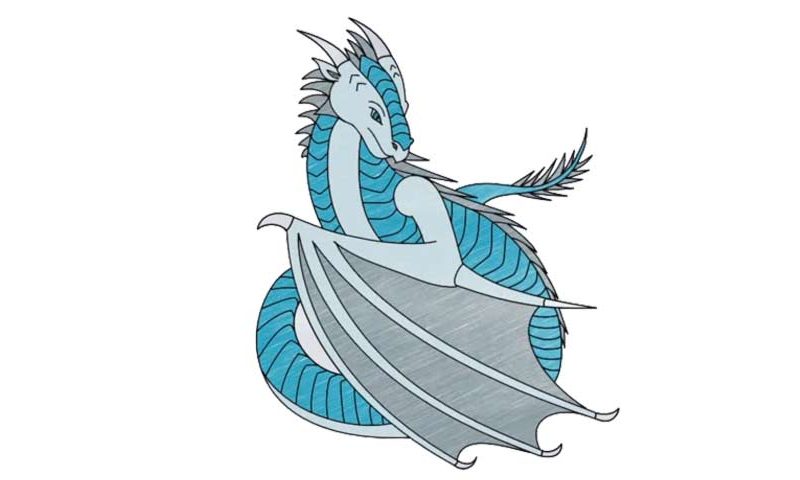
Learn How to draw Icewing – Wings Of Fire Quickly & Easily!
Drawing dragons is fun, and in this tutorial, you’ll sharpen your skills and master one or two tricks along the way. Wanna learn how to draw Icewing – Wings Of Fire? Then take your time and create some rough guidelines that will, well, guide you through the process. Start with the circle in the top corner – that’s the head (00 min 38 sec).
Before moving to the gorgeous wing, create a series of smaller circles below the original one (00 min 52 sec). Once that’s done, draw a number of repetitive curvy lines for the wing (01 min 37 sec). That’s basically it for the first stage of this how to draw Icewing – Wings Of Fire tutorial. The next step includes using a marker to draw the eye (02 min 47 sec).
After that, put the nostril in the middle of the second circle from the top and draw the rest of the nose. Then, use curvy and straight lines for the head and the “horns” (03 min 28 sec). If you’re happy with that, draw a small part of the neck and cover it with some tiny spikes that look like tilted triangles (04 min 14 sec). The rest of the how to draw Icewing – Wings Of Fire tutorial is relatively easy.
Let the rough sketch guide you and bring the wing forward. It should have straight lines and perky tips to accentuate the sharpness. Now use two super-smooth and curvy lines to define the body of our dragon (05 min 53 sec). No dragon without some spikes, right (06 min 13 sec)? They are very easy to draw. The tail should also be covered in those (06 min 37 sec). That’s pretty much it!
Before you learn how to draw Icewing – Wings Of Fire, did you know?
These majestic creatures are huge; plus, they can attack with their frost breath that freezes everything on its way. The Icewings mainly inhabit the colder regions of the realm and like to stick to themselves, as opposed to the other dragons.