Learn How To Draw Hearts In Love Quickly & Easily
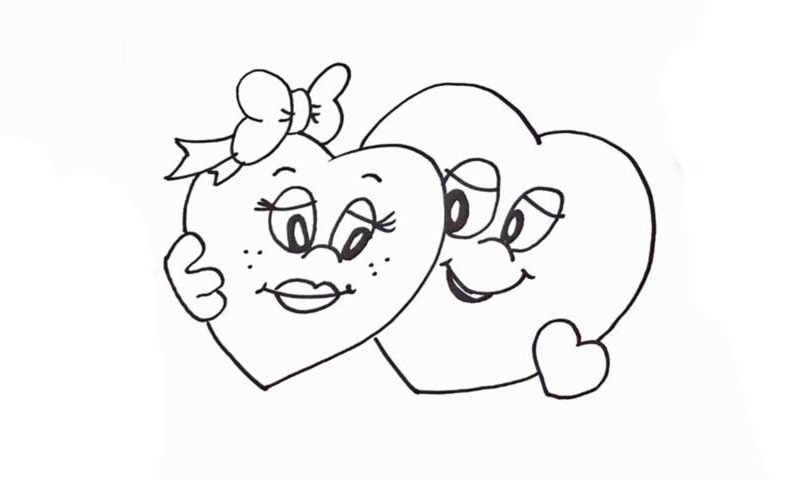
We begin this beautiful drawing in the left corner, where the lovely “lady” is (00 min 05 sec). Remember: all the curves in this how to draw Hearts In Love tutorial need to be extra smooth. The right side of the heart looks like something between the question mark and a reversed “C”, doesn’t it?
Once it’s in place, move to the ribbon bow on top of her head (00 min 14 sec). It resembles a dog’s bone from the old-school cartoons. The left side is much easier (00 min 38 sec). Don’t forget about the hand with three fingers hugging the heart.
For the eyes, use two identical oval shapes (00 min 44 sec). The eyelashes come next (01 min 05 sec). For the mouth, try to make the lips nice and thick (01 min 18 sec). Ok, now it’s time to take care of the “fella” on the right (01 min 30 sec).
If you did everything right with the first heart, this one will be much easier, as it’s almost exactly the same. But it’s considerably bigger and has a smile on its face. They look cute together, don’t they?
Before you learn how to draw Hearts In Love, did you know?
Since ancient times, humanity has been using the image of a heart to describe true love. These days, people are using the same image (including all kinds of emojis) to tell others how they feel. No one truly knows when this symbol became popular and who created it, but that’s beside the point.
What’s important to remember is the fact that your loved ones are always there for you, and if you want to express your love for them, use different variations of the drawing that we did today. This particular one will be perfect for that special girl in your life that you wanna spend the rest of your life with. Just look how cute they are together!
