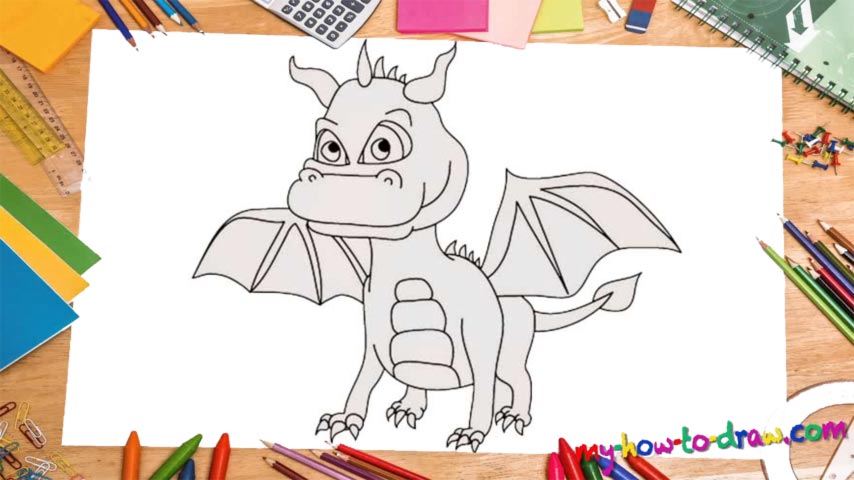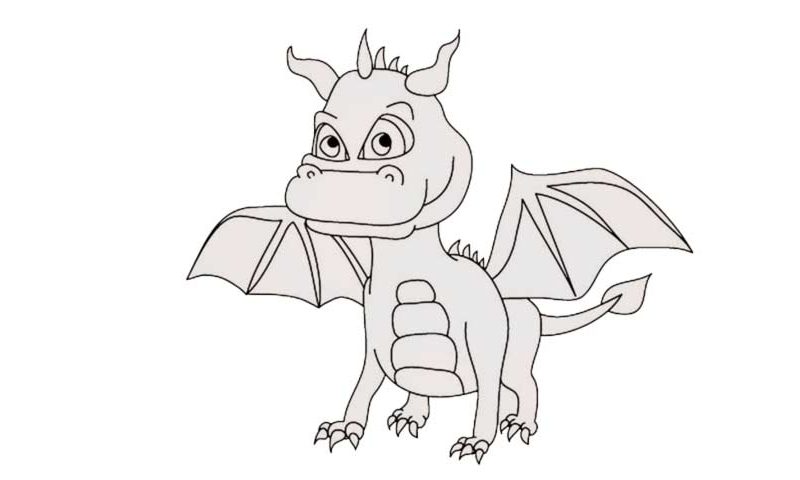
Learn How To Draw Dragons Quickly & Easily!
See those shapes that look like guitar picks? Start this tutorial by putting them next to each other and adding two C-like curves right below them (00 min 05 sec). That’s the intro to our how to draw Dragons tutorial. What you should do next is create the lower jaw and draw the eyebrows (00 min 10 sec). That’s the easiest step and will be done in a matter of seconds. For the mouth, you’ll need two simple curvy lines (00 min 14 sec).
The horns look more like drops of water and/or tears, don’t they? Obviously, there are more on our beast’s head, but we’ll get to them a bit later. I recommend completing the head, adding the eyeballs and the nostrils first. And if everything’s looking good, go back and create four more horns (one big on the left and three much smaller ones on top (00 min 20 sec).
Moving on with this how to draw Dragons tutorial, let’s take care of the body. Follow the video and create some basic lines for the legs and the wings. Two zigzag-like curves will help you complete the wings (00 min 25 sec). The body doesn’t come with any details except for those lines on the belly. Each leg has four claws (00 min 40 sec). The tail looks a bit like a lit match (00 min 50 sec).
Before you learn how to draw Dragons, did you know?
Do you love modern-day TV shows and video games? Then these all-powerful beings are very well known to you. Back in the ancient times, people used to admire these mythical creatures and wrote one too many books, novels, and scrolls about them.
If you follow the cultures of the most Asian and European nations, you’ll find traces of dragons on every step of the way. The Chinese, the Japanese, the Russians, and all the Easter-European folks used these beasts as a symbol for many different things.