Learn How To Draw Cartoon Cars Quickly & Easily!
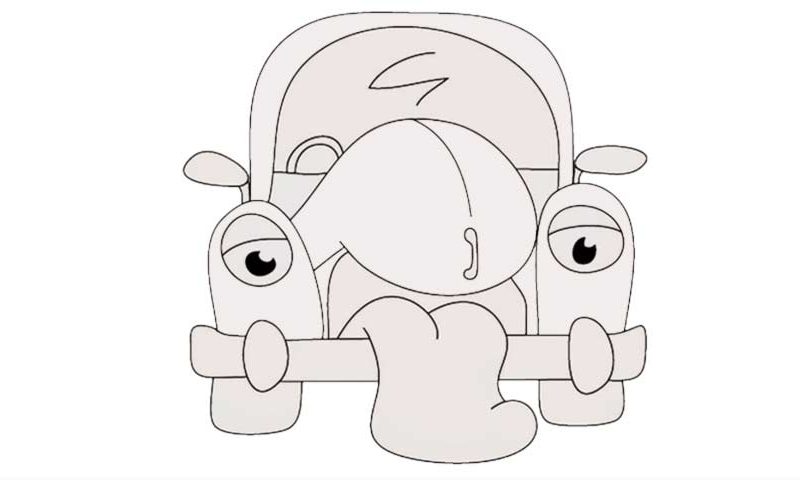
I recommend starting this tutorial with the tires (00 min 05 sec). They are the only ones visible in this particular drawing and sit at the very bottom of the paper. The next stage of this how to draw Cartoon Cars tutorial includes a curvy line that looks like the top of a heart and two round lines on the sides (00 min 08 sec). You’ve got two sets of lights here (00 min 12 sec).
The ones at the bottom look like ovals and are pretty straightforward. The ones at the top, however, are the vehicle’s eyes and come with pupils. If everything’s looking good so far, add a tall curvy line on top just like you see in the video. You’ll need two curves to make the frame look realistic (00 min 16 sec). Those ovals right above the eyes are the side mirrors. Next, use a simple line at the bottom to complete the tongue.
The final stages of this how to draw Cartoon Cars tutorial include the front bumper (just one long rectangular line) and the hood (00 min 20 sec). Use a circle-like shape for the hood and move on to the steering wheel (00 min 30 sec). Once that’s in place, you’ll be officially done with this video guide. I really hope you liked it and learned something valuable!
Before you learn how to draw Cartoon Cars, did you know?
Thanks to the popularity of animated movies that break all kinds of records at the theaters, the production companies are spending more and more bucks on big-budget blockbusters. When it comes to the animated films, there are almost no limitations whatsoever.
For example, in the insanely-successful Cars franchise, the vehicles are living, breathing creatures. Obviously, the team was inspired by the amazing cartoon cars from the comic books and introduced some of their own vision to turn it all into an eye candy for the audience.
