Learn How To Draw A TV Quickly
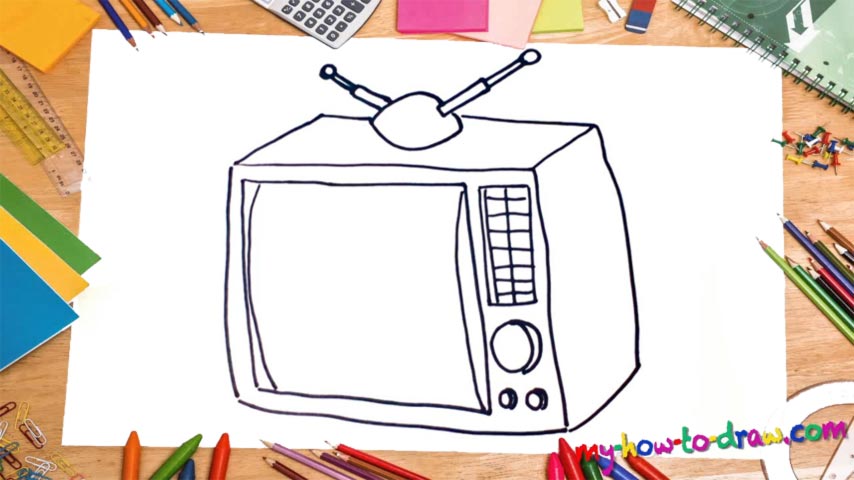
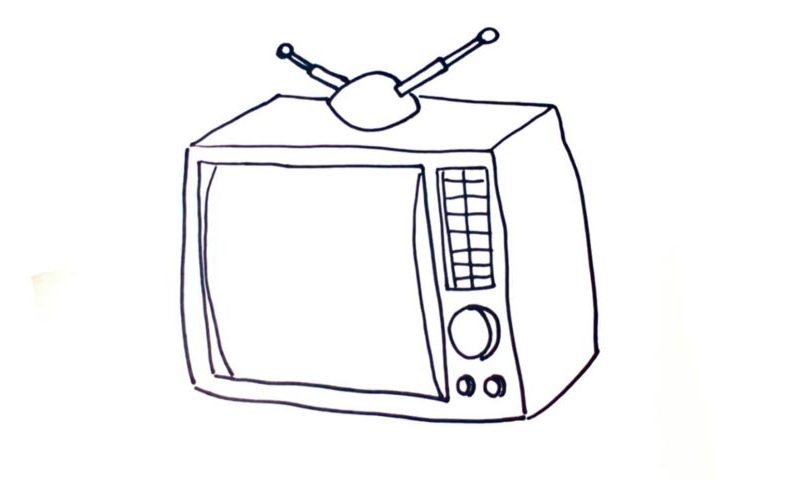
Start with a square that sits in the left corner of the paper (00 min 08 sec). Then, add the right side and the top of it to make the composition look three-dimensional (00 min 25 sec). Leave a tiny spot in the upper corner to place the mighty antenna (00 min 47 sec). It consists of an oval shape and two “sticks” coming out of it in both directions.
Alright, the foundation of this how to draw a TV tutorial is in place. Let’s get back to the square we created in the beginning and add the screen (01 min 23 sec). You’ll need a smaller square inside of the original one and two curvy vertical lines on both sides. The controls are located to the right of it (01 min 47 sec). The section with all those buttons comes first.
Basically, you’ll need a rectangle divided into multiple parts. The volume knob, the final part of this how to draw a TV tutorial, sits right below it (02 min 01 sec). Wait, there are two tiny circles located in the lower corner – don’t forget about them. Alright, the television is complete!
Before you learn how to draw A TV, did you know?
A couple of decades ago, the televisions were the biggest “entertainment devices” in the world, and they had absolutely no competition. Radio and audio players were popular, but not nearly as huge as the TVs. These days, they are being threatened by the Internet and all the tiny gadgets that can do everything faster and provide better quality.
The very first televisions became available in the 20s. However, it was after WW2 when the more advanced black-and-wide sets entered the homes of regular men and women. In the 50s, they were named the primary medium for interacting with the public and shaping their opinion on many things. In the 60s, the colored TVs were introduced, and they were truly awesome!