Learn How To Draw A Sea Turtle Quickly & Easily
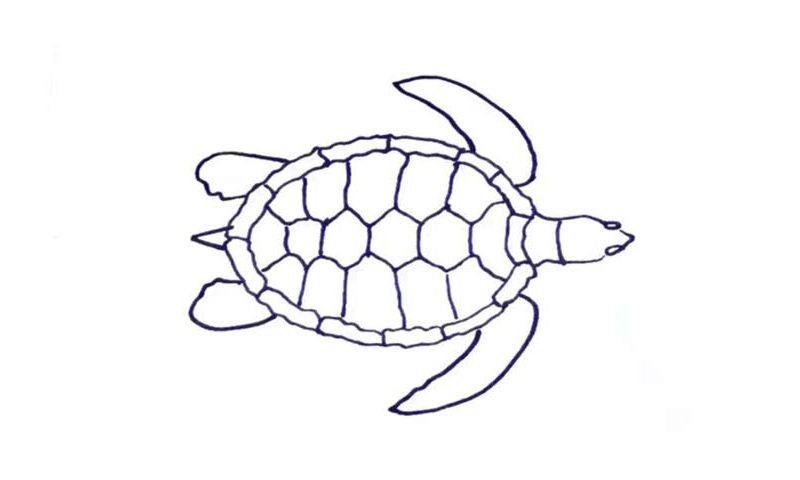
If you’re an experienced drawer, then just go ahead and start wherever you want. The rest of us will stick to the rules and begin this how to draw a sea turtle tutorial in the right corner, with the eyes (00 min 07 sec). The creature’s head looks a bit like a pen or a pencil, doesn’t it? If you’re happy with it, move on to the body (00 min 20 sec).
Make sure the shape is nice and round and zigzag-like at the same time. Now it all resembles a grenade or a lemon, right? The scutes (the tiny parts of the shell) are the next step (00 min 42 sec). There’s nothing difficult about this: just draw a series of equally-sized shapes around the shell and you’ll be alright.
To make the brute look even more realistic, go ahead and copy the texture that you see in the video to complete the back (01 min 05 sec). The limbs are the final part of the how to draw a sea turtle tutorial (01 min 40 sec). The limbs in the back look identical to each other; the same goes for the ones in the front (01 min 48 sec).
Before you learn how to draw A Sea Turtle, did you know?
These creatures come with a mighty (and incredibly sturdy) shell that covers almost every part of the otherwise fragile body. The shell isn’t one big “block” but rather consists of several smaller plates. The biggest difference between sea turtles and their terrestrial siblings is the fact that they have fusiform bodies.
Basically, this means that the sea turtles don’t have the ability to hide their limbs (including the legs, the hands, and, of course, the head) into their shells and survive an attack. On the bright side, this body form allows them to swim easily under the water and reach their destinations faster.
