Learn How To Draw A Pomeranian Dog Quickly & Easily
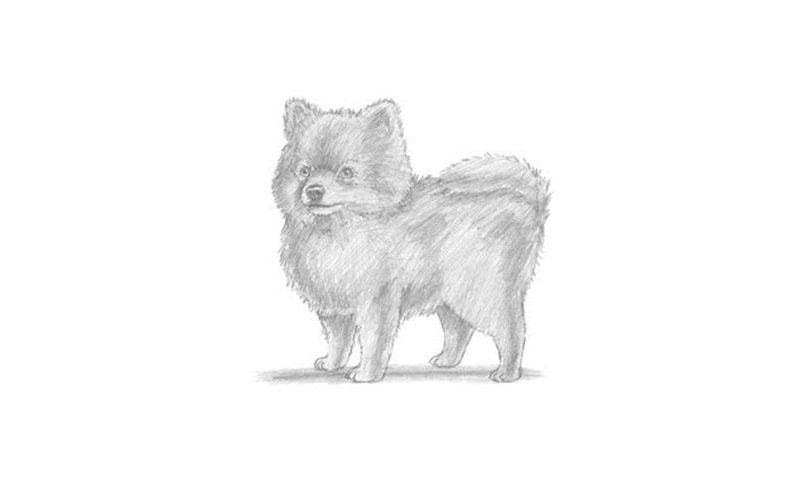
To keep the shapes, sizes, and proportions right, we’ll need three circles serving as guides (00 min 07 sec). Once the one in the upper corner is done, cut it in two with dividing lines and add a much smaller circle at the bottom (00 min 10 sec). The triangles on top are for the ears (00 min 16 sec).
To complete the intro to this how to draw A Pomeranian Dog tutorial, follow our guide and create two more circles, as mentioned earlier. Don’t forget about the short and skinny lines for the legs (00 min 23 sec). For the eyes, switch to dark strokes (00 min 30 sec). The nose looks like a potato with two dots inside (00 min 44 sec).
Those horizontal lines below it cover the mouth and the lower jaw (00 min 51 sec). To make the dog look more realistic, use the short/wavy strokes technique for the head and the body (00 min 56 sec). The legs are the final part of this how to draw A Pomeranian Dog tutorial (01 min 05 sec). Make them short and wide. The fluffy tail sits on top of the back (01 min 17 sec).
Before you learn how to draw A Pomeranian Dog, did you know?
This oh-so-cute doggie is the star of social media, funny videos, and cartoons. AKA the Pom, this tiny breed is surprisingly fast, nimble, and smart. Born and raised in Poland, it’s a toy dog. According to the experts, the Pom originated from the German Spitz, a much bigger and stronger breed.
The Pomeranian lives for 12-16 years and is always active, ready for action. In the 18th and 19th centuries, this dog was extremely popular among royalty, including Queen Victoria. Today, the Pom is officially registered as one of the most loved and recognized breeds in America (it’s in the top-20).
