Learn How To Draw A Lion Head Quickly
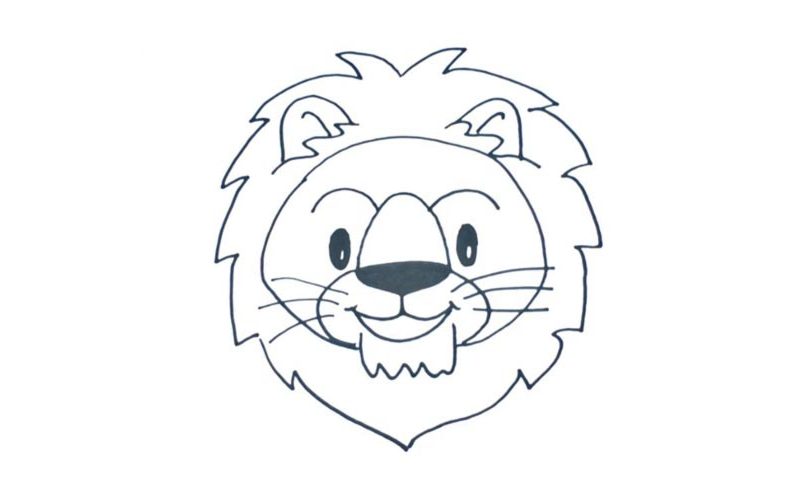
We begin with the majestic mane at the very top of the picture (00 min 08 sec). I recommend adding the right side first before moving on to the left. As you can see, the two sides are pretty much identical to each other in this how to draw a Lion Head tutorial. So, that means it will be a lot easier to master the lesson. Use zigzag-like lines for the mane to make it realistic.
If you did everything right, the lion must look like some exotic fruit right about now (00 min 37 sec). The ears are the next step. You’ll need three simple curves for each. Follow the video to get it right. Ok, now it’s time for us to work on the face (01 min 01 sec). Create an oval shape right below the ears and only then get to the facial features. The eyes are pretty tiny and basic (01 min 10 sec).
The nose looks a lot like a nut (01 min 34 sec). The brows – the next step in this how to draw a Lion Head tutorial – are located on both sides of it and “cover” the eyes. Color the lower half of the nose black before moving to the mouth (01 min 50 sec). Make the curves nice and smooth for a friendly smile (02 min 13 sec). The whiskers and the beard are the final steps (02 min 22 sec).
Before you learn how to draw A Lion Head, did you know?
These big, bad, and incredibly flexible creatures aren’t to be played with. We call them the “Kings of the jungle”, and that means no other beast out there is a match for the lions. Fast, strong, and fearless, they aren’t afraid of anything and can throttle even the biggest animal in a matter of seconds.
In this particular tutorial, we’ve got a rather “chill” lion that’s looking at us with a smile on its face. But don’t let that fool you: in the real world, you are to stay as far away from them as possible. And if you do end up in the middle of a lion territory, try to act “normal” and do not provoke them in any way.

you should teach with step by step WITHOUT a video!!