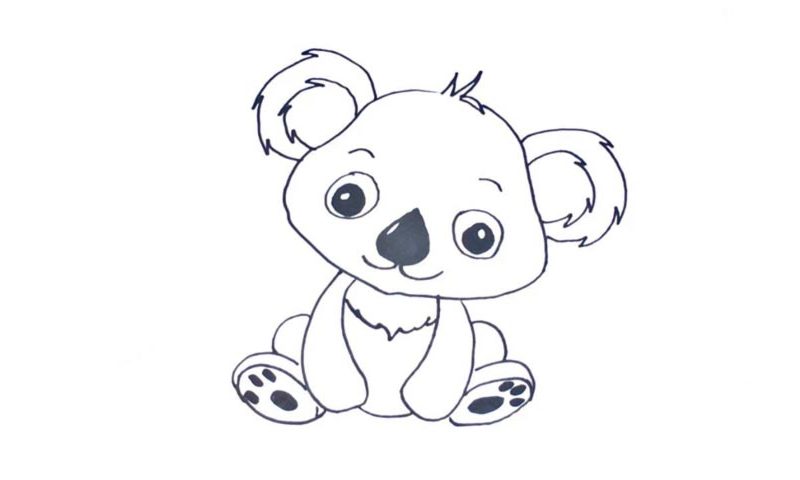
Learn How To Draw A Koala (Kawaii Version) Quickly
The head, the biggest part of this drawing, comes first (00 min 06 sec). Start in the left corner and leave a tiny spot at the top for the cute “haircut” (00 min 15 sec). The nose that looks like a tear colored black, is the next step in this how to draw a Koala (Kawaii Version) tutorial (00 min 25 sec). The eyes sit very low on the face, almost at the same height as the nose.
They are big, cute, and look identical to each other (00 min 55 sec). You’ll need to leave tiny white spots inside for a more realistic picture. If you’re happy with the result so far, move on to the big, fluffy ears (01 min 55 sec). You could say that they are this animal’s pride and joy, as folks around the world really love them. This part is easy: follow my lead and put two similar-looking and zigzag-like half-circles on both sides – that’s it!
Ok, now we’re off to the final stage of this how to draw a Koala (Kawaii Version) guide – the body (02 min 23 sec). For the hands, you’ll need two simple shapes like you see in the video. The legs are also quite simple (02 min 40 sec). They come with four spots each – one big in the bottom, and three smaller ones in the upper corner.
Before you learn how to draw A Koala (Kawaii Version), did you know?
Native to Australia, these animals are considered to be something of a rare guest on all the other continents. They love to stick to the coastal areas and are famous for that cute, “Instagram-ready” faces that include a pair of tiny eyes, a spoon-shaped nose, and big ears.
These beasts can be as heavy as 4-15 kg and have a body length of up to 85 cm. According to the scientists, they are quite lazy and can sleep as much as 20 hours a day. That sounds great, right? No need to wake up early for school and/or spend 8 to 12 hours on your daily duties!
