Learn How to Draw A Fire Quickly & Easily!
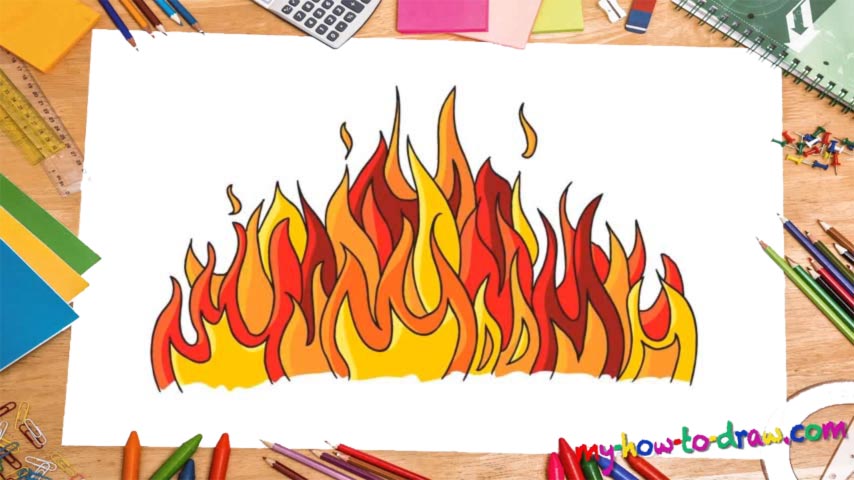
As far as the most popular things to draw go, fire is right on top of any list. Lucky for us, it’s not that hard to draw it. At first, you should create some sort of a rough guide for the future flames.
Remember: if you want to learn how to draw a fire, you’ll always need to make guidelines that will help you get every single curve and straight line right (00 min 19 sec).
The idea behind this technique is to us S-shaped curves to draw the tiny little flames that will be the body of the fire (00 min 25 sec).
Nothing fancy here: just use the video to draw just the right number of flames to make it look like a real fire. As a general rule, the more the better, but, of course, don’t overdo it (02 min 33 sec).
The next important step in our how to draw a fire tutorial is to add some background flames to give our composition more depth. The concept is the same. Getting the hang of it? Good, because now it’s time to draw the flickers (04 min 01 sec). That S-shape will help you do that. Restrain yourself from creating too much of these, though.
The final step would be to go over the drawing once again and fill in the gaps, so to speak (04 min 17 sec). If you want your front flames to look really gorgeous, then go ahead and add some new features (04 min 40 sec).
Ok, that concludes our how to draw a fire master class. As always, don’t forget to use a marker to get rid of the guidelines you drew in the beginning of our lesson.
Before you learn how to draw a fire, did you know?
Fires and flames are really cool and learning to draw them isn’t very difficult actually. In fact, if you watch the video you will see that the whole drawing is made up a series of S-shaped curves repeated over and over again. It’s quite amazing that when it comes to drawing, something that looks complicated can be broken down to the simplest little shapes and drawn easily.
A lot of the time we look at the end result and feel overwhelmed but there is no need to feel this way. Follow along with me and you’ll have a beautiful looking drawing of a fire at the end! The great thing about drawing is that you don’t have to be a pro – we can all put some effort into it and achieve great results!