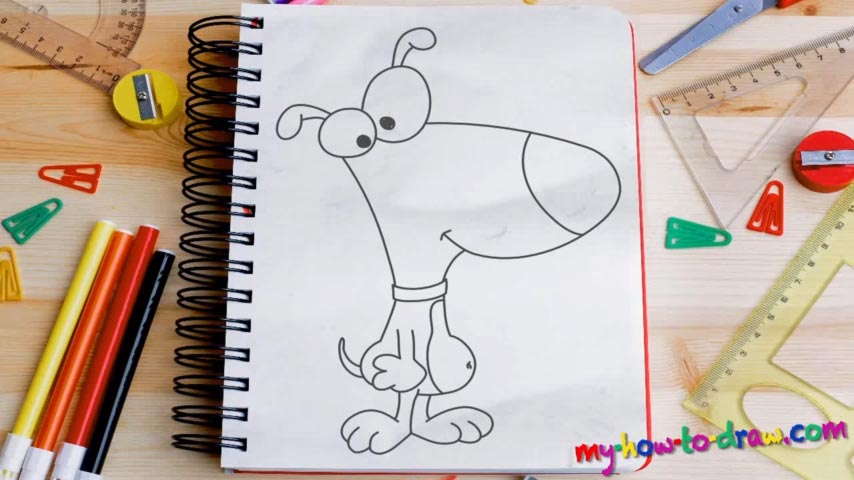
Learn How To Draw A Cartoon Dog Quickly & Easily!
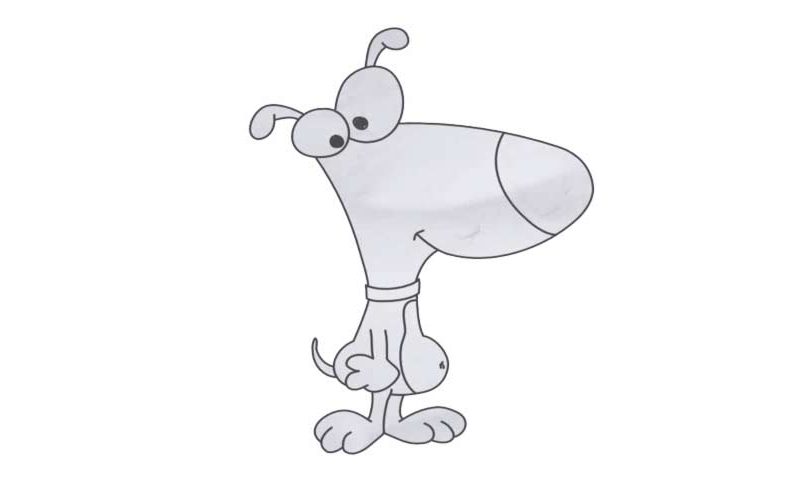
We start this fun drawing with the puppy’s eyes (00 min 27 sec). They sit on top of each other and look like a pair of eggs or rocks. The right one is much bigger, by the way. Once the pupils are in place, move on to the most important part of this how to draw a Cartoon Dog tutorial – the super-long nose (00 min 57 sec). It should be nice and curvy and have an arrow-like tip for the mouth – that’s very important.
After you add that dividing line, the nose will start to look like a rocket (01 min 11 sec). That’s actually it for the facial features. Draw the collar and get ready to get to the body (01 min 24 sec). Before you do that, make sure the ears are in place. They look alike and sit right on top of the eyes (which usually never happens, but this is a cartoon character; so, it’s ok).
See that hand? That’s the next step in our how to draw a Cartoon Dog tutorial (02 in 21 sec). The tail is incredibly tiny. The legs are almost identical and are not at all proportional compared to the rest of the body (especially the head) (02 min 41 sec). But they do look pretty awesome, don’t they? This is actually it for this video guide. The eyes and the nose (or, rather, its size) are the key elements. You can experiment with the rest.
Before you learn how to draw A Cartoon Dog, did you know?
As far as the most popular cartoon animals go, dogs are right there among the leaders. Over the years, we’ve seen numerous iconic characters like, say, Scooby Doo. Fun, full of life, and all kinds of awesome, dogs and puppies bring something new and exciting into our lives.
In this particular drawing, we’re dealing with a deliberately comical image of a dog, and it looks truly awesome. With that big nose, peculiar eyes and love for adventures, this little guy will become your new favorite, especially after you master this tutorial.