Learn How To Draw A Bengal Cat Quickly & Easily
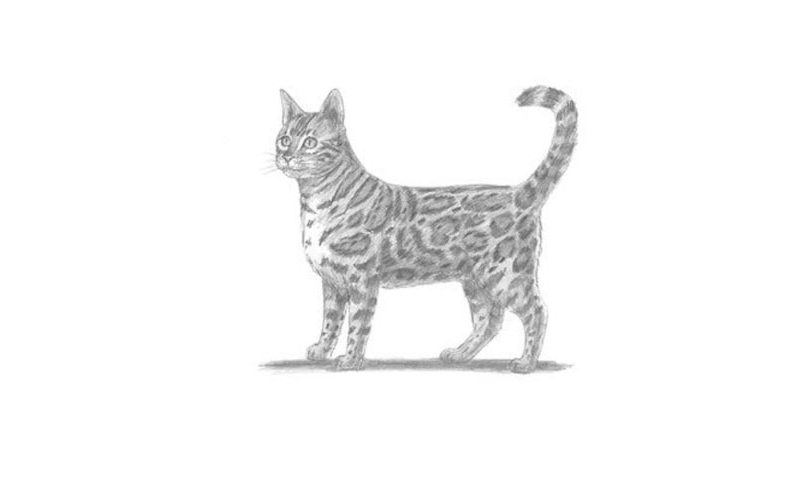
If you want to do everything the right way, follow our guide and let’s add three guiding circles first (00 min 07 sec). The two at the bottom are for the body; the smaller one in the upper left corner, in turn, is for the animal’s head. Use two dividing lines and a tiny circle for the face (00 min 18 sec).
Alright, that’s it for the intro to this how to draw A Bengal Cat tutorial. The ears on top of the head and the skinny legs come next (00 min 23 sec). The identical eyes feature tiny white dots and black vertical lines (00 min 34 sec). The nose looks like a tiny diamond (00 min 50 sec). To make the head look more realistic, follow the guides with wavy lines (01 min 05 sec).
If you’re happy with the how to draw A Bengal Cat tutorial, go ahead and work more on the legs (01 min 20 sec). They each have three toes. Finally, go over the guides for the body and make the lines firmer. Basically, that’s it. After you get rid of the light strokes, add the dots (00 min 20 sec).
Before you learn how to draw A Bengal Cat, did you know?
There are countless different cat species out there, but the Bengal Cats are special. The first thing you gotta known about them is that they were bred by the humans to serve as pets. The goal was to make them look like the bigger and more aggressive wild cat predators (ocelots, leopards, and others).
As a result, we have a cat breed that isn’t dangerous and still looks like the “elder brothers” that are hunting out in the open. The bright orange-light brown Bengal cats are the most popular ones among pet owners, even though there are also the snow-white Bengals.
