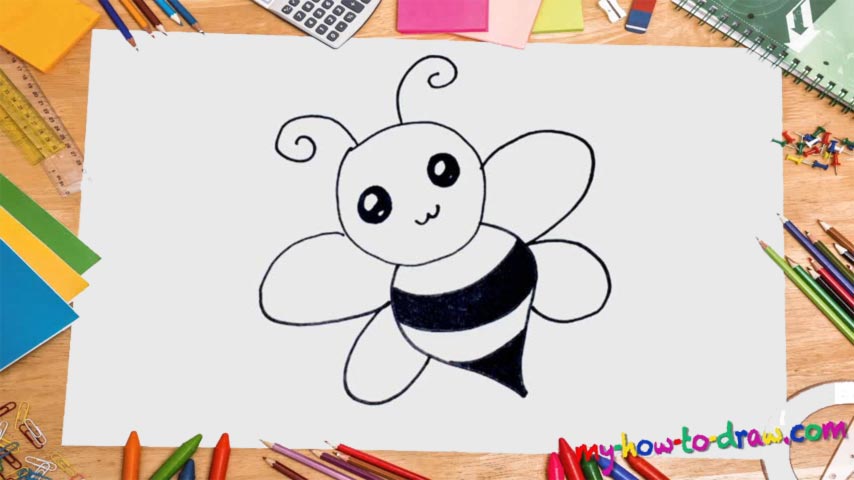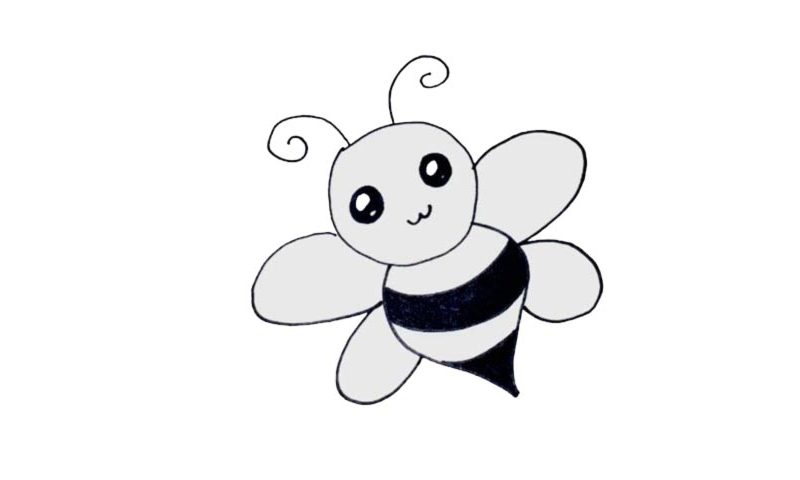
Learn How To Draw A Bee (Kawaii Version) Quickly
We begin this tutorial with the insect’s head (00 min 07 sec). You’ll need a regular circle for that. Don’t worry if it’s not perfect – that’s actually good in this case. The identical eyes are the next step in this how to draw a Bee (Kawaii Version) video guide (00 min 14 sec). Draw two tiny circles inside the already-existing ones to make them look more realistic. Color the rest black and let’s move on.
The nose is a piece of cake (00 min 48 sec). The “antennas” are the next step. They look exactly the same and won’t be a problem for you. The body of the bee follows (01 min 00 sec). Make sure the curves are nice and smooth. And, divide the body into four parts using horizontal lines. Color the parts in the middle and at the very bottom black (01 min 12 sec).
We’re practically done with this how to draw a Bee (Kawaii Version) tutorial. All that’s left to do is add the wings. The ones on top are bigger and wider. They begin in the middle of the head (in terms of height, of course), while the rest sit right below them. Alright, now we’re officially done with this lesson.
Before you learn how to draw A Bee (Kawaii Version), did you know?
These breath-taking insects are the closest relatives to ants and wasps; plus, they play a key role in pollination all across the globe. Furthermore, the bees are responsible for making honey, one of the healthiest and most beneficial products on our planet, give or take.
Overall, there are 20K species of bees in the world; they eat pollen and nectar. They can be as tiny as 2 millimeters and as big as 40 millimeters. The bees are irreplaceable members of the planet’s circle of life and we, the humans, will face a cataclysm if they extinct.