Learn How to draw A Strawberry Flower Quickly & Easily!
Even if you don’t like the routine you’ll need to take care of before getting to the real thing, that doesn’t mean you can skip the rough sketch. In order to learn how to draw a strawberry flower properly, you’ll still have to put the rough guidelines in. Otherwise, you’ll end up making a mess of things and/or will be disappointed with the result.
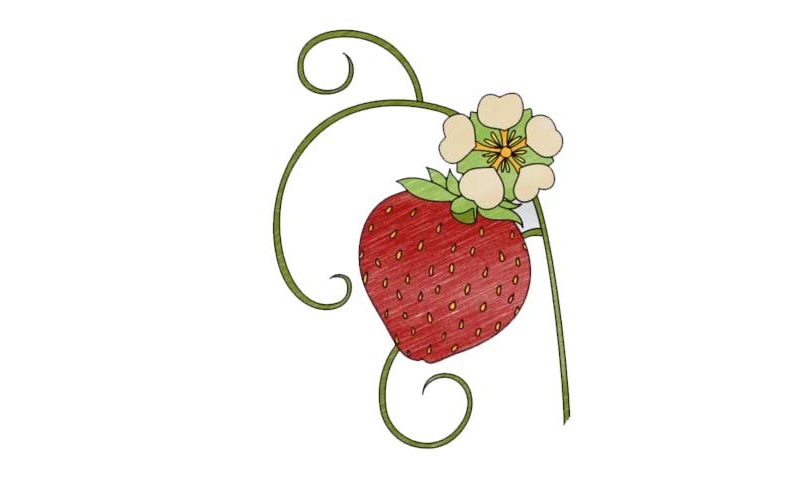
So, start with the circle in the lower right corner and work your way up from there (00 min 36 sec). The flower on top of it might seem to be the hardest part, but it’s actually not (00 min 52 sec). You’ll need five oval shapes and connect them with each other via straight lines. That huge curvy line that starts at the bottom and ends at the top is the stem (01 min 37 sec).
If you’re happy with what you’ve got so far in this how to draw a strawberry flower tutorial, use a marker to fine-tune the flowers (02 min 21 sec). They look a lot like tiny hearts. Put a dot in the middle and connect it with each one of them. The strawberry itself comes next (04 min 51 sec). Let the huge circle we made in the beginning be your guide but make the fruit a bit thinner at the bottom.
Those tiny dots all over the strawberry will give it that realistic touch (05 min 46 sec). Try to make them of slightly different shapes and sizes. Once those are in place, all you’ll have to do is finish the stem and enjoy the beautiful drawing (06 min 01 sec). Obviously, one should always delete the rough sketch before moving on to coloring (06 min 49 sec).
Before you learn how to draw A Strawberry Flower, did you know?
If you’re just getting started and want to draw something that’s relatively simple but still looks good, this drawing of a beautiful strawberry flower is exactly what you need. Practice more, hone your skills and in a week or so you’ll be able to create breathtaking strawberries!