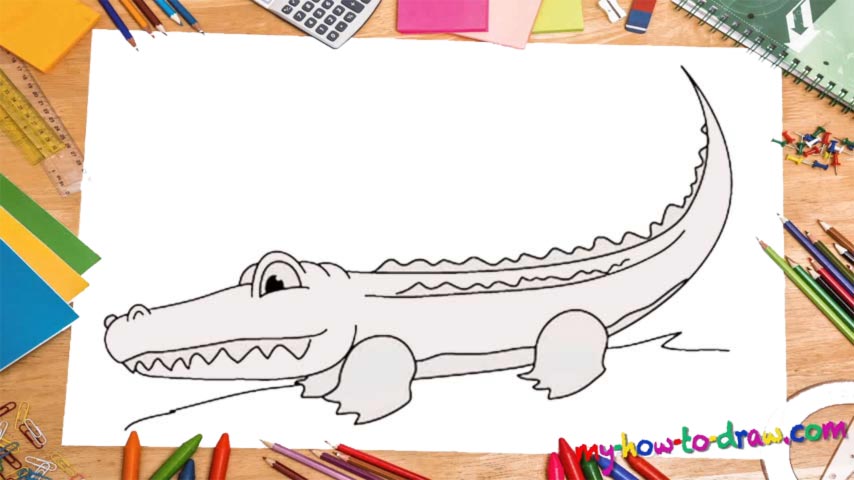
Learn How To Draw An Alligator Quickly & Easily!
Begin with the right eye (00 min 05 sec). It’s pretty big and comes with a bright pupil. After you put the two curves on its right side, add the super-long curve that will cover the body and the tail of this beast (00 min 25 sec). Use another C-like line to complete the tail. It might seem too steep at this moment, but after you complete this how to draw an Alligator tutorial, everything will fall into place.
The legs come next (00 min 31 sec). They’re identical to each other and come with three toes each. From the side, they look a lot like human heads. Connect them to each other and move on to the next stage – the head (00 min 43 sec). I recommend dealing with the upper jaw first before moving on to the lower one. Draw the nostrils and use a curvy line to bring this home.
That zigzag-like line is not for the teeth – it’s there for the texture (01 min 00 sec). Once you finish the head, you’ll be almost done with this how to draw an Alligator tutorial. All that will be left to do is create several lines for the body. That zigzag at the very top will make our creature look realistic and “spikey” (01 min 17 sec). You’ll need a similar line right below it to complete the picture.
Before you learn how to draw An Alligator, did you know?
Alligators aren’t to be messed with: these scary creatures are deadly under the water and are stronger, faster, and more flexible than the humans. The scientists are calling them the direct descendants of the dinosaurs, which explains the reptile features.
An average alligator weighs 350-400 kg and is 4 meters long. A beast like that can battle the strongest animals on the planet but prefers to stick to itself and hunt the mammals that drink water from the lakes. Keep that in mind next time you go for a swim!