Learn How To Draw Tweety Bird Quickly & Easily
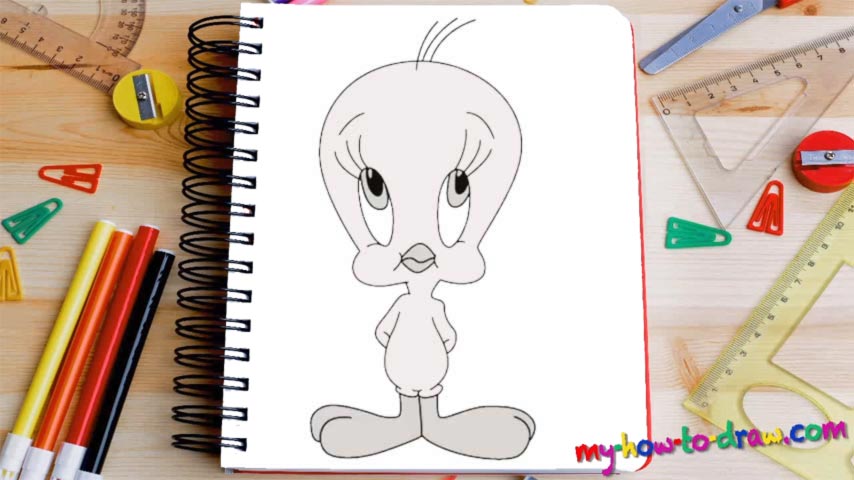
The upper half of this adorable character’s head looks a lot like a light bulb (00 min 05 sec). Keep that image in your mind while working on the first step in this how to draw Tweety Bird tutorial. The lower half – the cheeks – are identical to each other, and give the bird that classic American look (00 min 08 sec). If everything’s nice and smooth, move on to the eyes.
They are big and bright, just like you would expect from a cartoon hero (00 min 12 sec). Use two tall ovals for them and get some work done on the belly. The body is unrealistically smaller than the head, and that’s totally fine in this case (00 min 16 sec). The hands are hidden behind Tweety’s back, and the legs are very short. The pupils, the brows, and the lines on both sides of the mouth are the next stage of this how to draw Tweety Bird tutorial (00 min 20 sec).
And now it’s time for us to get to the feet (00 min 25 sec). They are also pretty huge and are as big as the entire body. Thankfully, it won’t take much effort to draw them. The final steps in our video lesson are the cute eyelashes, the strand of hair on top of his head, and the mouth (00 min 38 sec). Once you put all those elements in, you’ll be done with this tutorial!
Before you learn how to draw Tweety Bird, did you know?
This adorable little thing has been around for longer than most of his modern-day fans. As one of the first cartoon characters to win over the hearts and minds of the regular kids, Tweety deserves a special place on the pedestal. He’s a true legend and an icon.
Funny, engaging, and full of life, Tweety showed the entire world that you don’t have to be a big, bad predator to be happy and get things done. With the help of a few trusted friends and a mighty set of brains, the Bird finds a way to battle his opponents and stay on top of his game.