Learn How to draw Smurfette Quickly & Easily!
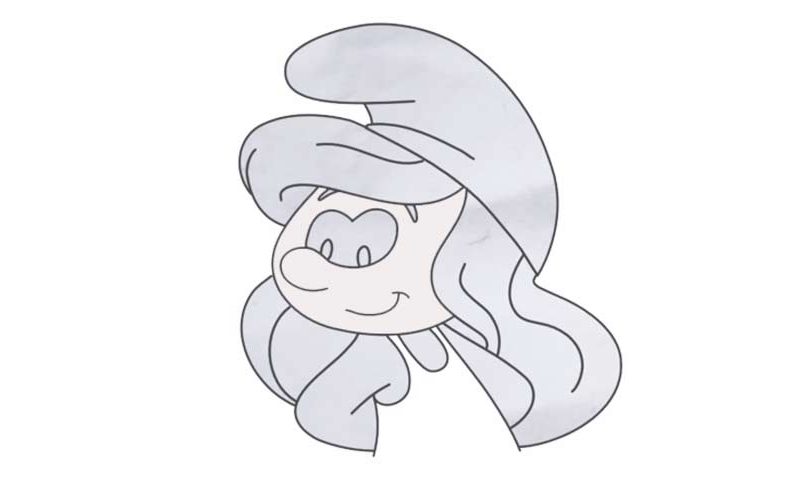
In this post, we’ll be drawing a beautiful young lady, which automatically means every single line should be smooth and round. The nose and the eyes are connected to each other, and we begin this how to draw Smurfette tutorial with a curve that looks like a reversed S-like shape and/or a question mark (00 min 27 sec). After you add the zigzaggy part for the top of the eyes, it will start to look like a heart.
Put two half-circles inside, and you’re done! The mouth is just a simple line with an arrow tip (00 min 50 sec). Now we use two curvy lines – one horizontal, one vertical – to shape the girl’s head. If everything looks good, move further down to take care of the body (01 min 05 sec). It doesn’t come with tons of details – only a simple t-shirt.
We don’t see the character’s fingers, which makes this how to draw Smurfette tutorial very “friendly”. Obviously, the hardest part of this lesson is the hair (01 min 48 sec). I recommend drawing the cute hat first – that way, it will be much easier to handle the hair. You’ll need several long lines to the final part. Watch the video-guide closely and take notes!
Before you learn how to draw Smurfette, did you know?
As the only girl in the kingdom of the Smurfs (before Sassette came around, of course), this young lady has a certain kind of responsibility. Originally, she was created by her kind’s greatest enemy – Gargamel – and was used to spy on the little blue brutes.
However, she was strong enough to resist his will and became an official member of the Smurf family. This character was first introduced to the world back in 1966. And the recent insanely-popular animated movies gave Smurfette and her entire family a new life.