Learn How to draw Papa Smurf Quickly & Easily!
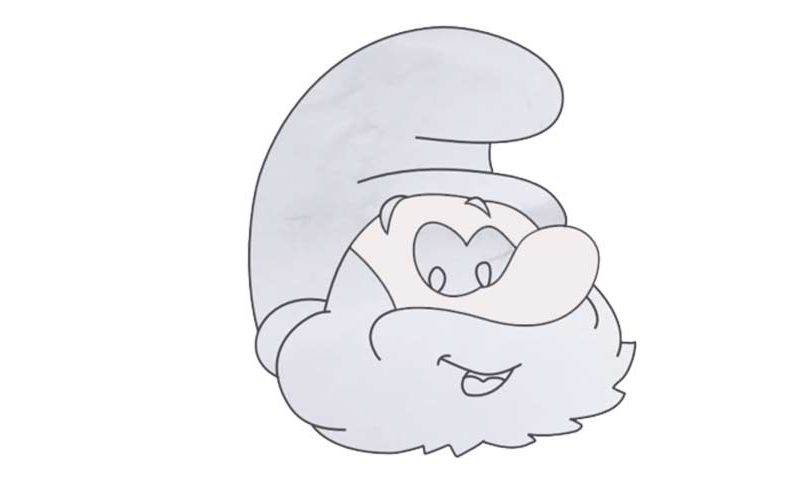
Fact: once you master this fine tutorial, you’ll be able to create all kinds of wonderful portraits of wizards. We begin to learn how to draw Papa Smurf with a curve that covers the eyes and the nose (00 min 27 sec). It looks a bit like a reversed “S” and a question mark with extremely long and curvy tips. Turn the upper half into a heart and put two tiny ovals inside of it for the eyes (00 min 41 sec).
The eyebrows sit higher than they usually should, but this is a fantasy character, so, it’s all good (00 min 55 sec). If you’re happy with the face so far, move on to the head. Obviously, this is a very important part; Start with the upper half and only then get to the fluffy bottom. Thу beard will turn this character into a trust-worthy old man (01 min 18 sec). It might look like the head is too small and should be taller, but don’t change anything!
The mouth is also a vital stage in our how to draw Papa Smurf tutorial, as it allows us to create a certain mood. It’s quite easy to draw, though. The final thing to take care of is the fancy hat (01 min 51 sec). Use three separate curves to make the process easier. The hat should be approximately as tall as the hero’s head (give or take).
Before you learn how to draw Papa Smurf, did you know?
This kind-hearted grandpa is really old: he’s been around for about 545+ years and is considered to be one of the most “ancient” Smurfs in history. As the leader of an entire village and someone that the kids look up to, Papa Smurf has to always do the right thing.
Even though the forest where the blue creatures live is wonderful and full of light, darkness is always lurking in the shadows. It’s up to Papa Smurf to protect his relatives and keep them from harm’s way. Magic and wisdom are the greatest weapons in this man’s hands.