Learn How To Draw A Nose Quickly & Easily
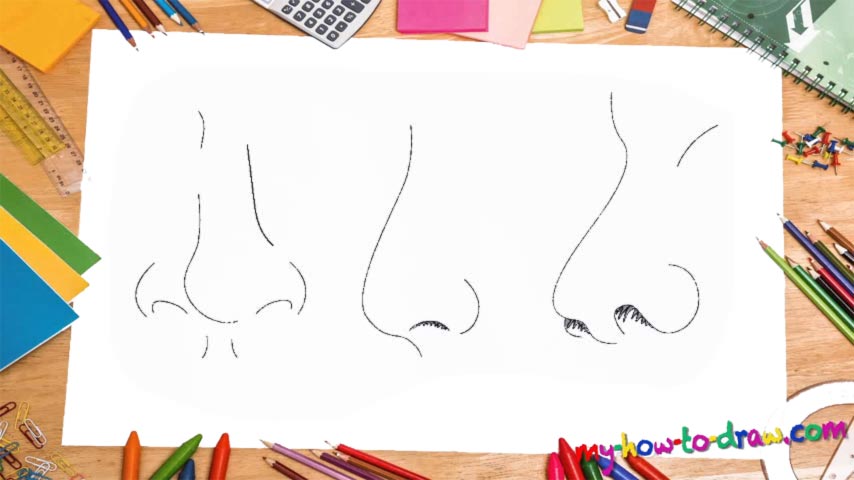
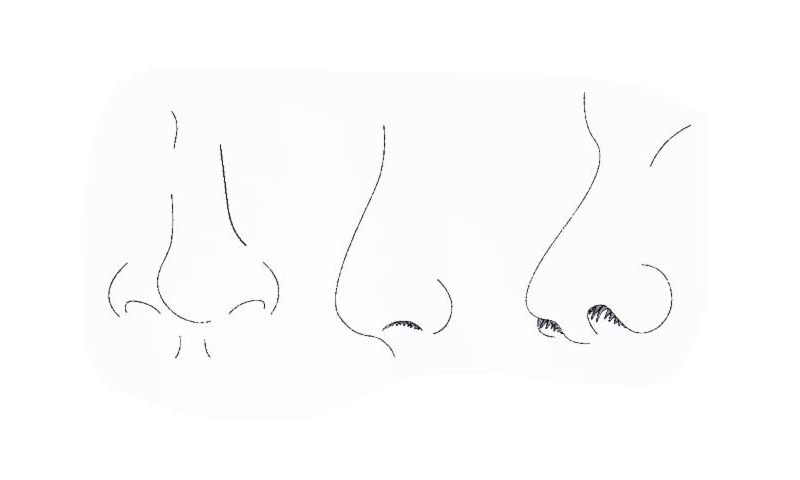
This is one of those video guides that might seem too easy and simple but are, indeed, quite advanced and important. True, we’re not getting into many details, but the end result does look great. So, place your paper right, grab your favorite pencil, and let’s check out this how to draw a Nose tutorial. The one on the left comes first (00 min 28 sec).
That curve at the bottom looks like the treble clef. The nostrils are identical (00 min 40 sec). Now, you can go ahead and connect all the lines to each other, but what I did in my example looks more realistic. Before moving on to the next “showpiece”, don’t forget about those lines right below the nose. The second nose is the easiest one (01 min 00 sec). You’ll only need three lines for it.
The last part of this how to draw a Nose tutorial is a bit more sophisticated (01 min 15 sec). The angle/perspective is somewhere between the first two and we can see both nostrils. Follow the guide closely and keep the proportions right. Ok, that’s pretty much it. Obviously, these are basic images, but they will look awesome in complete compositions.
Before you learn how to draw A Nose, did you know?
When it comes to creating a realistic portrait, the facial features are one of the toughest parts to “crack”. That’s because we have a very strong image of people’s faces in our heads and any deviations are instantly caught by our all-seeing eyes. Yep, it’s that simple.
The nose is a very important part of the human face and should be treated respectfully. In this particular tutorial, we’ve got three angles, or, rather, perspectives that you can use in your drawings. It’s a male nose, but it’s not that different from the female nose.