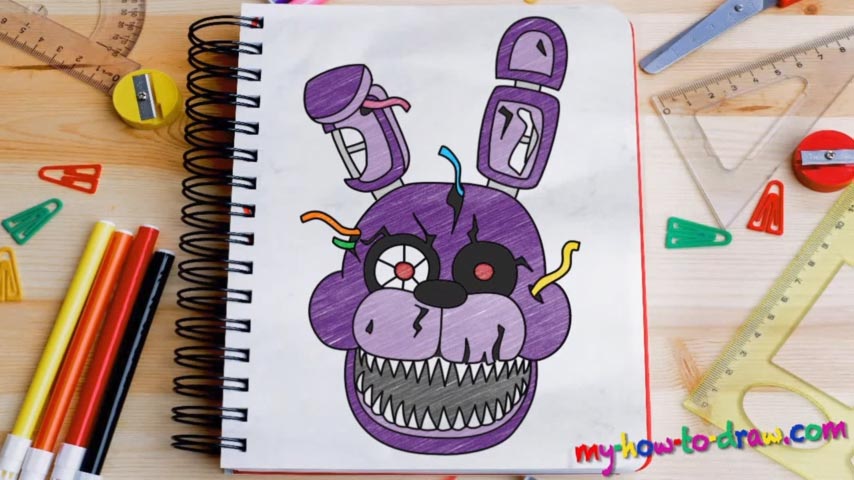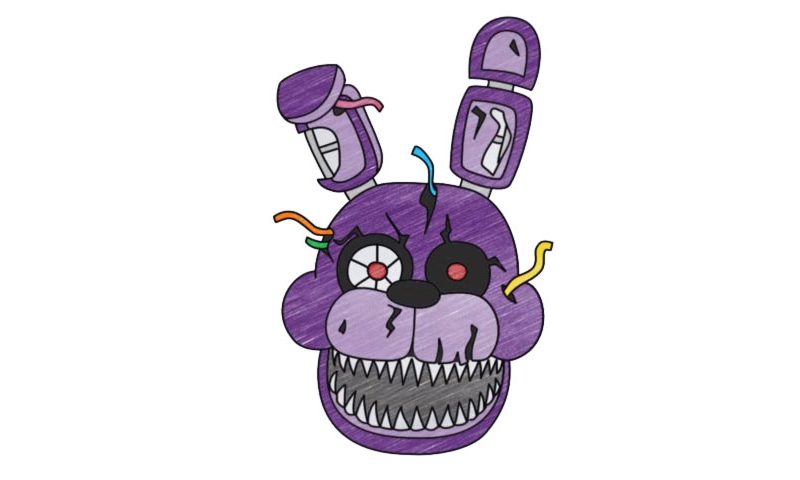
Learn How to draw Nightmare Bonnie Quickly & Easily
Bunnies usually look cute and you want to hold them in your arms. But that’s not really the case with this one. Scary, sinister and violent, it will follow you in your dreams. Today we’ll learn how to draw Nightmare Bonnie in a step-by-step guide. Even though this drawing is relatively simple, we’ll still need to draw the rough sketch (00 min 38 sec).
It’s basically a combination of two overlapping circles (almost equal in size), 3 straight lines and one curvy shape. Create the huge circle on top first, and then move on to the rest. If you’re happy with the guidelines, join us in moving forward and using a marker to finish this great how to draw Nightmare Bonnie tutorial.
If you watched some of our other videos, then you might already know that we love to start with the nose of the FNAF characters (01 min 40 sec). The lower part of the head and the jaw come next. Don’t forget to add those cracks in the right places. See those scary-looking teeth? Make them small and spiky (02 min 39 sec).
The eyes are almost identical to each other, with the exception of an additional circle on the left one (03 min 10 sec). They’re quite easy to draw and won’t cause you any problems. Again, don’t forget about the cracks that turn Bonnie into a unique character. If the facial features look good, take care of the ears (04 min 44 sec).
Yes, we do know that they look like antennas of some sort. The left one might be a bit challenging (05 min 15 sec). The next stage of the how to draw Nightmare Bonnie tutorial includes going back to the lower jaw and adding the missing teeth (06 min 31 sec). Finally, erase the pencil marks and color the scary dude.
Before you learn how to draw Nightmare Bonnie, did you know?
If you want to keep this nasty monster away, you’ll have to be extremely cautious and follow the rules. He’s walking around like he owns the place and won’t hesitate to jump scare the player at any given moment.