Learn How to draw Minnie Mouse Quickly & Easily!
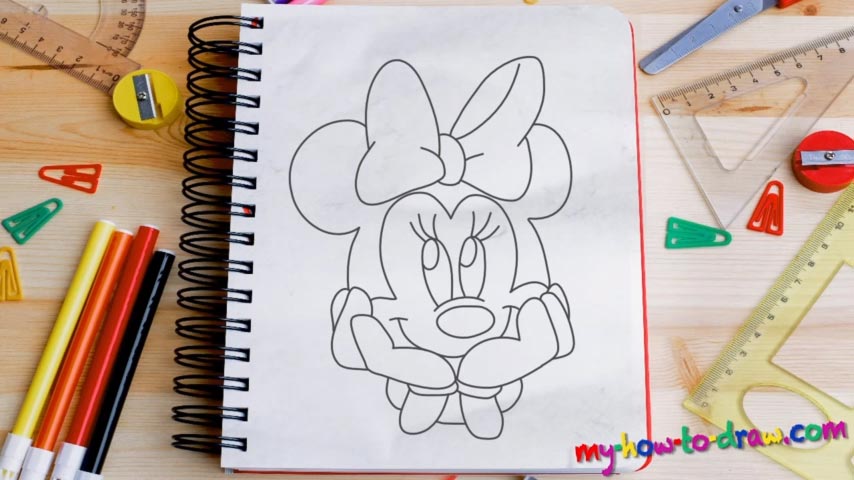
We start this tutorial with the nose because it’s a simple facial feature and allows us to add the rest of the parts easily and without any hassle (00 min 29 sec). The eyes are the next stage in this how to draw Minnie Mouse guide. Before you get to them, create a simple horizontal line that they will sit on. The eyes are identical in size, shape, and placement. Same goes for the lashes. If everything looks good, get to the hands (01 min 15 sec).
Create a V-like curve below the nose (a little bit to the left) and only then draw the fingers. Overall, you’ll need three fingers on each side. Once that’s done, put another primitive curvy shape in for the mouth (02 min 11 sec). The girl looks a bit like a genie right now, doesn’t she? That will change soon! Use a shape that looks a lot like the upper half of a heart to complete the head (02 min 22 sec).
And now we get to the most important part of this how to draw Minnie Mouse tutorial – the bow (02 min 37 sec). It’s super-easy – just make sure the size is right. All good? Ok, now add the huge ears (two half-circles on both sides of the bow) (03 min 15 sec). Finally, go back down and draw a couple of lines to finish the hands. And that’s it for this tutorial!
Before you learn how to draw Minnie Mouse, did you know?
If you know Mickie (who doesn’t, right?), then you also know this adorable young lady. She’s the hero’s girlfriend and was first introduced to the world back in 1928 (which makes her 90 years old). Sweet, loving, and caring, Minnie is a sight for sore eyes.
The public knows her as one of the most fashion-friendly mice in the world: those bows on her heard are truly epic, and she’s got tons of them! At first, she was just another character; but the audience fell in love with her and Disney turned her into a “main event”.