Learn How to draw Mickey Mouse Quickly & Easily!
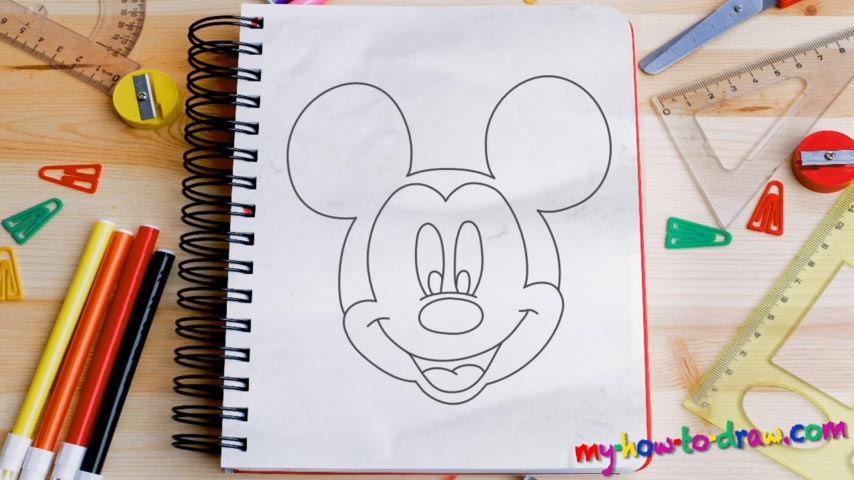
What is the most important part of an iconic cartoon character? Is it the nose? Not really sure! Anyway, that’s where we’ll start this how to draw Mickey Mouse tutorial (00 min 30 sec). It’s just a simple horizontal oval shape. Add a curve right above it and place the eyes on top. They look exactly the same and consist of four half-ovals in total (00 min 42 sec).
The mouth is the next step. It doesn’t have any teeth (or, at least, they don’t show). Use two perfectly-smooth lines to shape the mouth; the tongue is as simple as they come. Before you move on to the head, don’t forget about the chin and the edges of the mouth (01 min 28 sec). Ok, now it’s time for us to take care of Mickey’s cheeks (01 min 40 sec). Obviously, they are identical, but because of the slight tilt, the right one looks like it’s bigger.
The top of the head is a piece of cake. The last part of this how to draw Mickey Mouse tutorial are the ears (02 min 07 sec). They are pretty huge and take up a lot of space on the paper. Thankfully, they consist only of two circles in the top corner – nothing else. Connect them to the cheeks with two curvy lines and complete this tutorial!
Before you learn how to draw Mickey Mouse, did you know?
Mickey is one of those guys that never lose hope and are always ready to get down to business. Nothing’s regular about his life: every single day, this courageous mouse has to overcome a number of obstacles and fight the craziest enemies to ever walk the Earth.
He was first introduced to the world in 1928 and is still a fan-favored character. Overall, he’s featured in 130+ films, which is a tremendous result. Furthermore, in 1978, 50 years after his official debut, Mickey received the first star (by a cartoon character) in the Walk of Fame.