Learn How To Draw Lisa Simpson Quickly & Easily
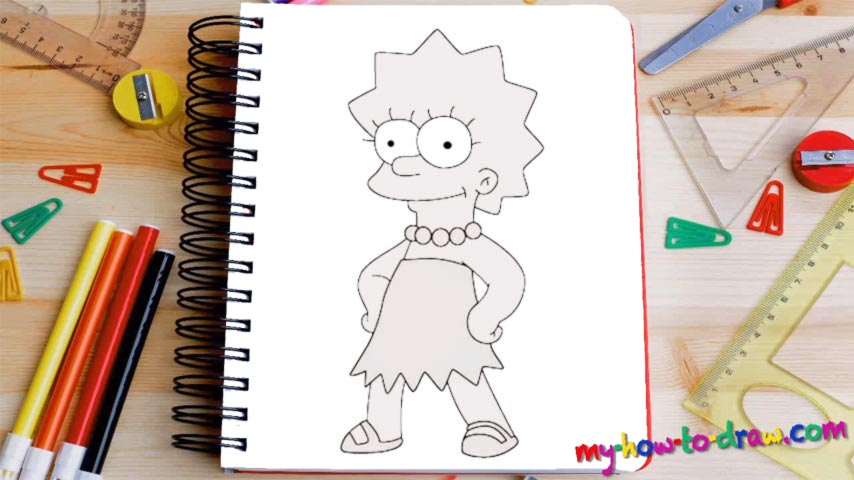
As you could’ve already guessed, the nose and the eyes are the first steps in this video guide (00 min 05 sec). That part is pretty much the same when it comes to this family, especially the ladies. During the how to draw Lisa Simpson tutorial you’ll see that the “like mother like daughter” saying is perfect for these ladies. The girl has great beads around her neck (00 min 16 sec). Plus, the eyelashes are nice and big.
The head looks like a zigzag and comes with several “stars” on top (00 min 28 sec). Once you complete that step, you’ll be almost done with the top of this drawing. Now we move on to the body and get right to the hands (00 min 32 sec). That dress slash skirt comes next. It’s got spikes at the very bottom that resemble those on her head. Yes, that’s a very important thing in this how to draw Lisa Simpson tutorial.
To finish this drawing, add the legs. I recommend starting with the shoes, as they’ll allow you to get the length of the legs right (00 min 40 sec). Those flip-flops slash sandals almost touch the very bottom of the paper. Ok, now we’re done. Go back to the eyes and add one last touch to complete this composition.
Before you learn how to draw Lisa Simpson, did you know?
This 8-year-old girl is not just your regular kid. She’s gifted, charismatic, and can take care of herself. She’s got a mighty brain and far exceeds the standards of intelligence for a child her age. Plus, she’s the moral compass for the Simpsons, bringing peace into the household.
And since her parents were never heavily involved in her upbringing, Lisa was free in choosing her hobbies. As a result, she can play the guitar, rides horses, and wants to finish school earlier so that she can get into advanced studies at a prestigious university.