Learn How to draw Ironman Quickly & Easily
With the MCU taking over the theaters worldwide, Mr. Stark is getting more and more popular. In this quick tutorial, you’ll learn how to draw Ironman. Even though this is a superhero, we’ll still need to follow the routine and create a couple of guidelines that will serve as a rough sketch. This is practically the easiest sketch on our website.
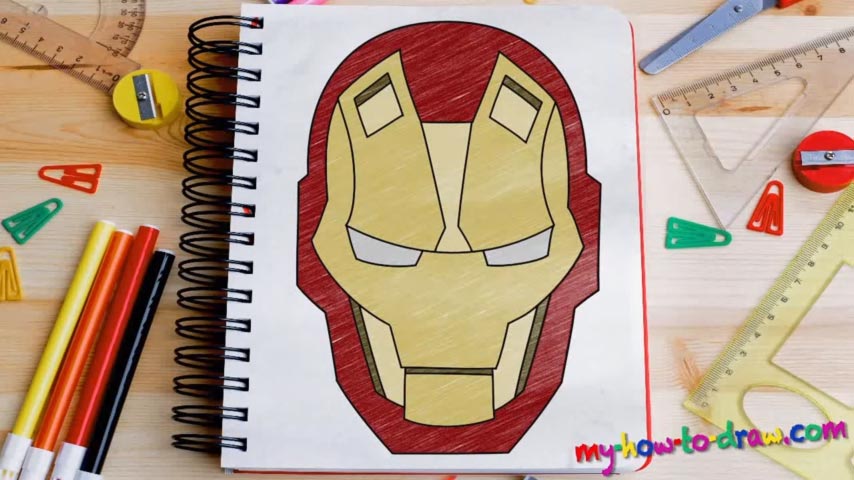
Begin with that huge oval shape in the middle of the paper that pretty much takes up all the space (00 min 39 sec). After that, create a straight vertical line to divide the head and add two curvy horizontal lines in the middle (a bit lower, actually) for the eyes. That’s pretty much it for the intro. Now we use the marker and learn how to draw Ironman.
Start with the eyes, or, rather, the line right above them (01 min 21 sec). Once you’re done with that, move on to the lower part (01 min 40 sec). Please keep in mind that even though this is a robot, most of the curves need to be as smooth as possible. The mouth is a bit “rectangular”, though (01 min 52 sec).
The upper half of the head pretty much duplicates the lower half, with minor differences. Before you go ahead and color this awesome metallic head, get rid of the pencil strokes. The classic combination of red and yellowish works great (03 min 43 sec).
Before you learn how to draw Ironman, did you know?
As the leader of the Avengers, a billionaire, and a genius inventor, Tony has to work harder and be smarter than the rest of the crew. His heart and mind are in the right place, and he’s ready to do whatever it takes to protect the world from the bad guys. With an army of robots behind his back and the best technology, he’s up for any kind of challenge.