Learn How to draw ‘I Love You” in 3D Bubble Letters Quickly & Easily!
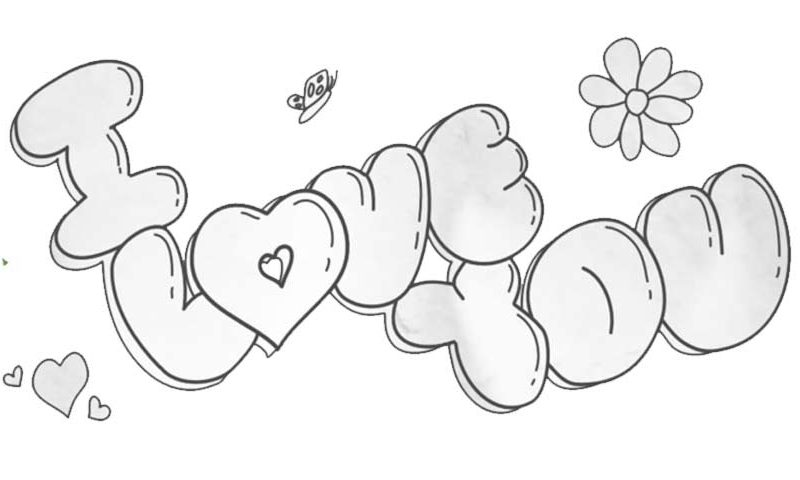
As any other tutorial that involves writing a simple phrase using “special” letters, this one’s pretty easy. Today we’ll learn how to draw ‘I Love You” in 3D Bubble Letters, ladies, and gentlemen! The “O” is shaped like a little heart. Let’s begin there (00 min 28 sec). Once it’s in place, add another tiny heart inside of it and go from left to right starting with the “L”.
If the “Love” looks good, move up and add the eye that looks like a reversed dumbbell and/or a bone in a cartoon dog’s dream (01 min 08 sec). Ok, now we’re down to the last word in this phrase (01 min 21 sec). There’s nothing special about this part: the letters should be as big as the ones we’ve been dealing with so far. It’s just that the “O” is not a heart this time around.
The next stage of this how to draw ‘I Love You” in 3D Bubble Letters is fun (01 min 47 sec). See that flower in the top left corner and the hearts in the bottom left corner? Put them in before moving on to the final part (02 min 23 sec). The goal here is to add “shadowing” lines for every single letter to make them look like they’re three-dimensional.
Before you learn How to draw ‘I Love You” in 3D Bubble Letters, did you know?
The so-called “Bubble” letters are very popular these days. First of all, they’re quite easy to draw. Second, they look great and allow us to accentuate the fact that we love someone. The skills you obtain in this tutorial will help you do other drawings like this one.
Some people like to mix this style with various others, turning the original concept into something entirely different. But in this particular video-guide, we focus on the “Bubble” effect only. The letters look 3D and in-your-face.
