Learn How To Draw Homer Simpson Quickly & Easily
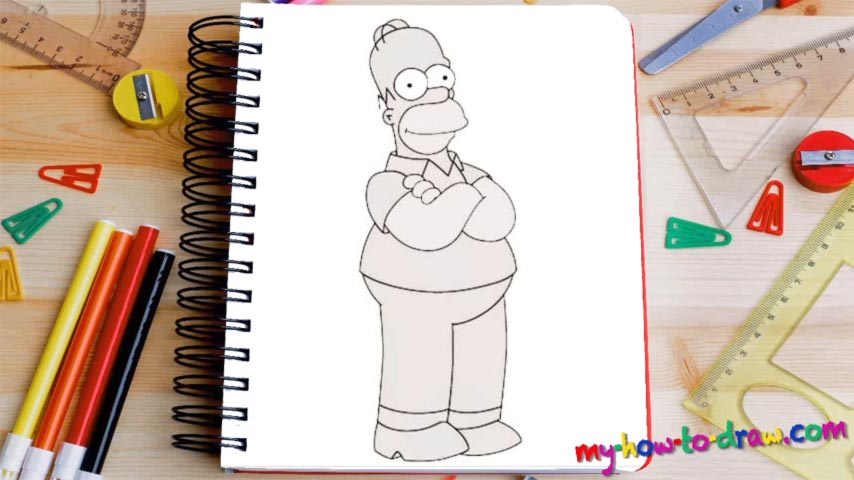
See that curve that looks like a reversed “S” (00 min 05 sec)? Use it to outline the mouth and the nose. You’ll need another line to complete the mouth and two ovals “sitting” on the nose for the eyes (00 min 12 sec). That’s the intro to our how to draw Homer Simpson tutorial. By the way, the man’s eyes are smaller than those of the other members of the family.
Overall, Homer’s head is pretty long and gives him a “solid” look (00 min 17 sec). It’s very smooth, especially at the top. After you add that little bit of hair on his head, move on to the body (00 min 20 sec). He’s dressed in a classic shirt and simple pants. Start with the neck and gradually get to the hands (00 min 30sec). He’s got them folded and we can only see the three fingers of his right arm.
Ok, now we’re done to the last steps in this how to draw Homer Simpson tutorial. The lower part of his body is the easiest part (00 min 40 sec). Make sure you accentuate that belly before you get to the legs. Those classic shoes at the bottom are a piece of cake (00 min 55 sec). To finish the guide, add the pupils (01 min 07 sec).
Before you learn how to draw Homer Simpson, did you know?
This guy is the most classic American working man one could ever come up with. He’s got a beautiful and devoted wife, and together they’re raising three brats. He’s not in the best shape and loves to sit in front of the TV with a bottle of beer and pizza in his hands.
True, he’s not perfect, but when it comes to his family, he’s ready to do whatever it takes to protect them and to provide for them. His relatives love him and respect the sense of duty that Homer is known for. He’s a safety inspector and the job pays the bills. That’s practically it!