Learn How To Draw Birds Quickly & Easily!
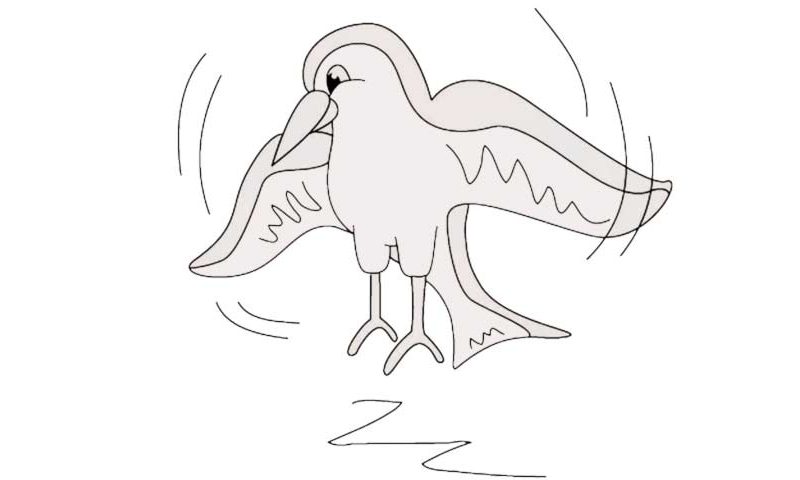
The easiest way to start this tutorial is the beak that looks like a carrot (00 min 04 sec). There’s a tiny curve on the right side – don’t forget about it. Next, use a reversed C-like line for the top of the head (00 min 12 sec). That’s is a very important part of this how to draw Birds tutorial – make sure you get it right.
The wing comes next (00 min 16 sec). It’s pretty huge. The feet, or, rather, their upper parts are located directly below the head and right next to that wing (00 min 20 sec). The tail follows. It’s a pretty simple shape – don’t even worry about it. If everything looks good, connect the beak with the feet using one simple line (00 min 27 sec). The left wing is the next step in this how to draw Birds tutorial (00 min 35 sec).
It’s a bit smaller than the right one because of the angle. Put a line through it just like you did with the other one and go back to complete the feet (00 min 47 sec). They are identical, by the way. Wait, did we forget about the eye? Nope, but it’s actually time to take care of it (00 min 55 sec). The pupil should be nice and big. And before we finish this guide, don’t forget about those “stripes” on its wings and tail (01 min 07 sec).
Before you learn how to draw Birds, did you know?
It’s a known fact that birds have been around for much longer than we, the humans. There are countless species out there, and they all serve an important purpose. That means we gotta protect them from nature’s cataclysms, or, at the very least, not kill them.
According to the scientists, if something has feathers, jaws, lays eggs, and comes with an extremely flexible skeleton, then it’s a bird we’re talking about. They come in different shapes and sizes, with the tiniest species being 5 cm long and the biggest ones reaching 2.75 meters.
