Learn How To Draw Anime Girl Quickly & Easily
We begin with the fancy hair. Create the big and long strand first before moving on to the smaller ones (00 min 21 sec). Once it’s in place, use a curvy line to outline the lower part of the head (00 min 35 sec). The right ear, the next step in this how to draw Anime Girl tutorial, looks like a reversed “C” (00 min 45 sec). That lock of hair on her forehead follows.
The strands are chaotic, that’s true, but they’re all part of a great haircut, and it means you’ll need to follow my every stroke. See that long curve (01 min 40 sec)? Draw it to complete the top of the girl’s hair on her head. Keep adding details until you reach the neck (02 min 35 sec). She’s got a classy shirt on, which further accentuates her beauty.
You’ll need a series of simple lines to define the top of her body (03 min 19 sec). After those are in place, move on to the final stage of this how to draw Anime Girl tutorial – the facial features (03 min 50 sec). The nose and the mouth are super-primitive. The eyes, however, are a piece of work. They are identical to each other, though, which makes it that much easier to complete this drawing.
Before you learn how to draw Anime Girl, did you know?
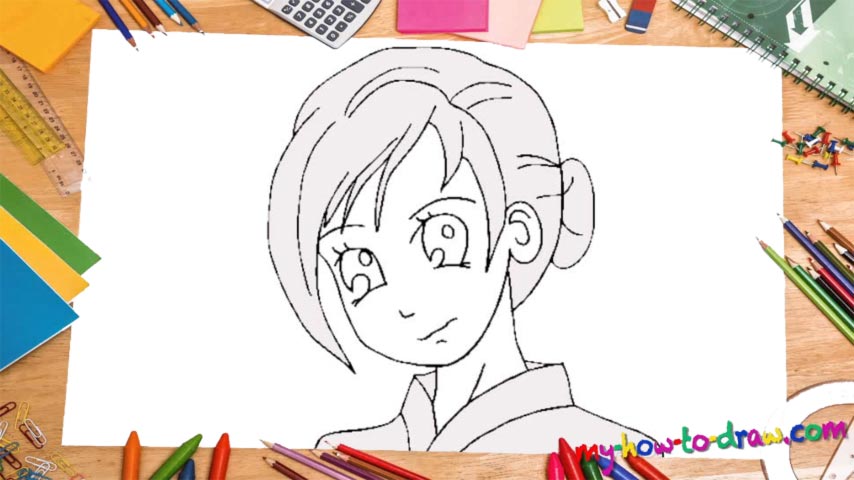
The male artists in Japan are big fans of the opposite sex and really like to create strong images of independent young women fighting the bad guys. In this particular example, we’ve got a classic anime gal with those trademark big eyes and a fearless stare.
The nose and the mouth are very basic (and simple) while, say, the haircut should always be nice and fluffy. This is one of the most popular examples of a girl in anime, and once you master this video guide, you’ll be able to handle other drawings in this style.