Learn How to draw Angry Birds Stella Quickly & Easily!
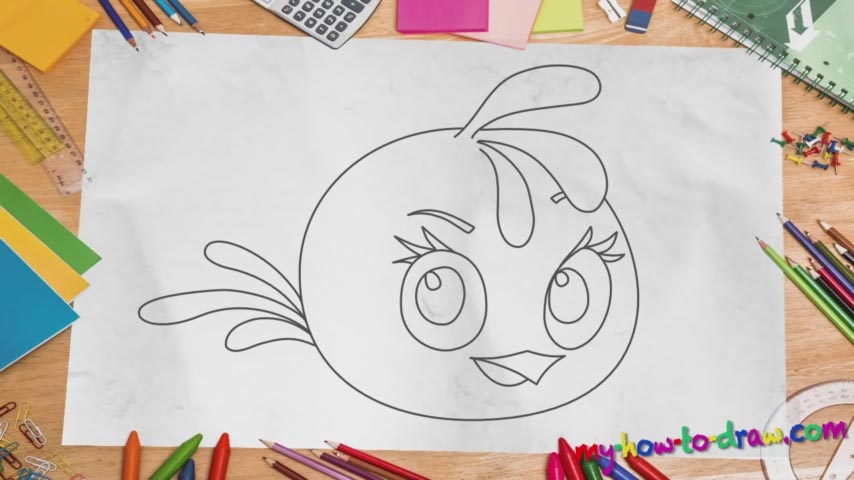
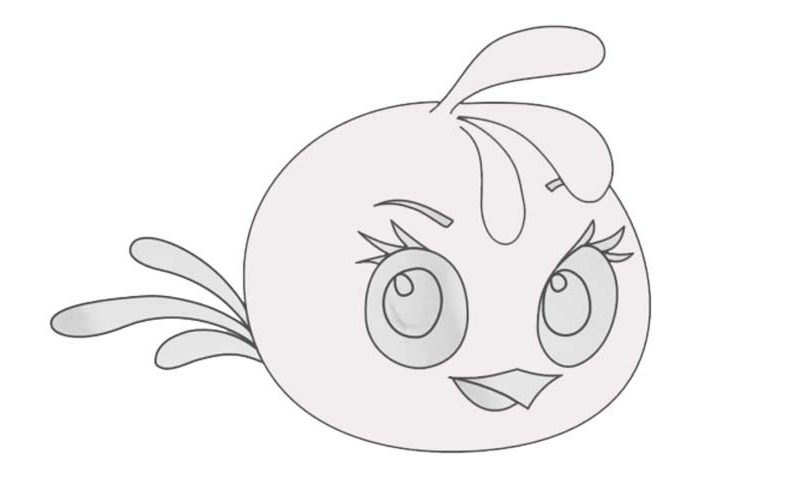
Usually, when it comes to the AB characters, they’ve got really huge beaks and super-tiny eyes – it’s their trademark look. But that doesn’t apply to this beauty. We begin to learn how to draw Angry Birds Stella with the big, fabulous eyes that take up most of the space on her pretty head (00 min 28 sec). You’ll need two oval shapes to get this done.
Now, even though the eyes are, essentially, identical, the left one is a bit larger because of the angle. You’ll need three circles in total to successfully complete the eyes – that’s it! The beak comes next. As mentioned in the beginning, it’s middle-sized and sits very close to the eyes (01 min 00 sec). At the same time, the crest is quite enormous (01 min 14 sec). Obviously, it’s imperative to get its size right.
As the most in-your-face part of this how to draw Angry Birds Stella tutorial, it deserves your attention. If everything looks good, use a curvy shape to outline the lady’s head (01 min 30 sec). Then, go ahead and add the eyelashes and the eyebrows in order to turn this girl into a real beauty. The last thing to do is to add that wing on the left (02 min 03 sec).
Before you learn how to draw Angry Birds Stella, did you know?
Just take a good look at those big, enchanting eyes – isn’t Stella a doll? She’s the brightest start on the Bird Island and is considered to be a lethal threat. Yep, don’t let those good looks fool you: she’s got a mean temper and isn’t afraid to show it!
That doesn’t mean Stella isn’t sweet because she actually is the sweetest thing in the world. But when her friends and/or enemies get on her nerves, this dashing lady proves that she’s not to be messed with. Adventurous and full of fun, she’s a keeper.