Learn How To Draw A Spider Quickly & Easily!
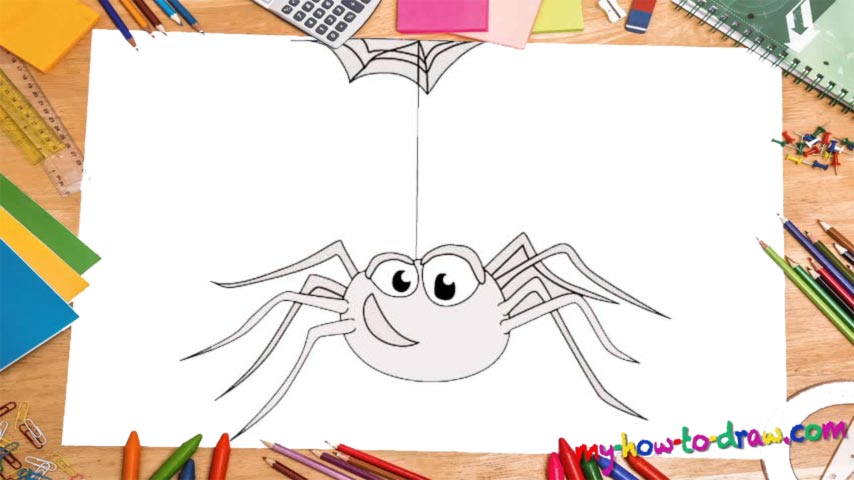
Let’s begin with this fancy fella’s eyebrows (00 min 04 sec). Once they’re in place, add the eyes – two circles right below them (00 min 08 sec). The last part of the intro to the how to draw a Spider tutorial, the pupils, come next. My recommendation: create two tiny ovals colored in black and then add a little bit of white in the top right corners.
If you’re happy with everything so far, get to the legs. The insect has four in total, and they’re pretty much identical to each other (00 min 20 sec). Start with the ones on top. Then, either follow my exact actions in the video guide or go your own way. The goal is to draw four pairs of legs – eight in total – and make sure they’re overlapping each other correctly – that’s it (00 min 30 sec).
The legs are the most important part of this how to draw a Spider tutorial. The rest is relatively easy. Use a curvy line at the bottom to connect the various parts to each other (00 min 46 sec). See that tilted half-moon in the left corner of the face? It’s the mouth (00 min 52 sec). The last thing to do is add the web in the top corner. Begin with creating a T-like shape. The rest of the web should follow.
Before you learn how to draw A Spider, did you know?
What do you know about these insects? Not a lot, probably; still, they are very much present in our lives, especially in the suburbs (I’m talking about the harmless kind). They come with 8 legs and lethal fangs that can (and do) inject venom to kill their prey.
By the way, spiders are officially #7 in the list of species diversity on planet Earth. Get this: by 2017, the taxonomists have discovered almost 48 thousand species! That’s pretty crazy, right? Yes, it’s safe to say that they are slowly, but steadily taking over the world :).