Learn How To Draw A Puppy Quickly & Easily!
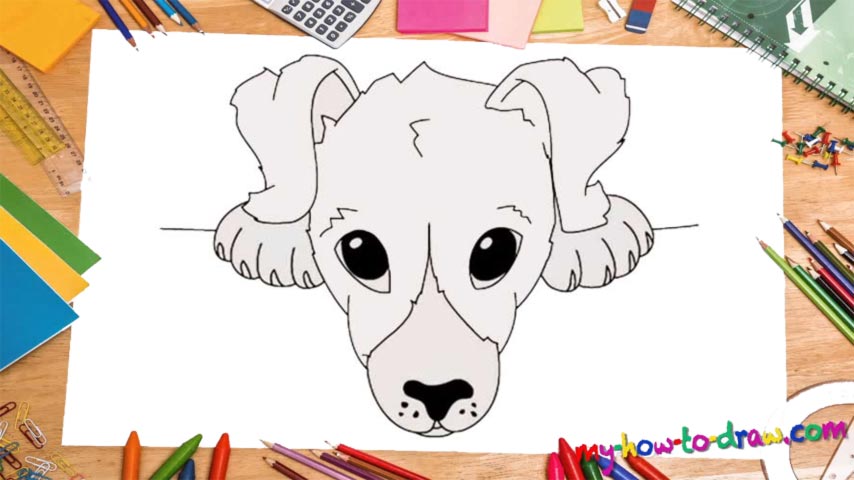
The best thing about this tutorial – it’s got 100% identical sides, which means if you handle, say, the right side, you can just go ahead and reverse-copy it to the left (if you’re working on a computer). But we won’t do that. Instead, we’ll learn how to draw a Puppy the right way (00 min 05 sec). The eyes (which, of course, look the same) and the nose come first. Color the cute nose black right now.
The huge pupils come next (00 min 08 sec). Use two curvy lines to shape the jaw and the bottom of the dog’s head and move on to the top (00 min 12 sec). The ears look like “S” shapes and/or certain types of mushrooms, don’t they (00 min 16 sec)? The lines should be nice and fluffy, as opposed to being super-smooth. That reversed “V” right between the eyes and the nose will help you complete the brute’s head (00 min 25 sec).
But before you move on to the last stage of this how to draw a Puppy tutorial – the paws – don’t forget about the brows. You’ve got four fingers for each paw and, naturally, four claws (00 min 30 sec). This is probably the easiest part of this tutorial. Make sure you keep the size right, though. The line that the puppy is leaning on is the final step (00 min 44 sec).
Before you learn how to draw A Puppy, did you know?
What can we say about puppies except that they make the world a better place? In the animal kingdom, they are one of the most fragile creatures and need the support of the mother 24/7 to survive in the harsh world out there. Maybe that’s why we love them so much?
They say if you bring a puppy home, it will be more loyal to you than an adult dog. According to statistics, the Americans are the biggest fans of these adorable brutes and the vast majority of the US families own at least one dog (or any other pet, for that matter).