Learn How To Draw A Heart Quickly & Easily
Do you know what the biggest and most common mistake that people make when trying to create this drawing is? They struggle with the three-dimensional image simply because they approach it wrong. In this how to draw a Heart tutorial, we’ll teach you the right way. So, let’s begin with adding the right half of our heart (00 min 05 sec).
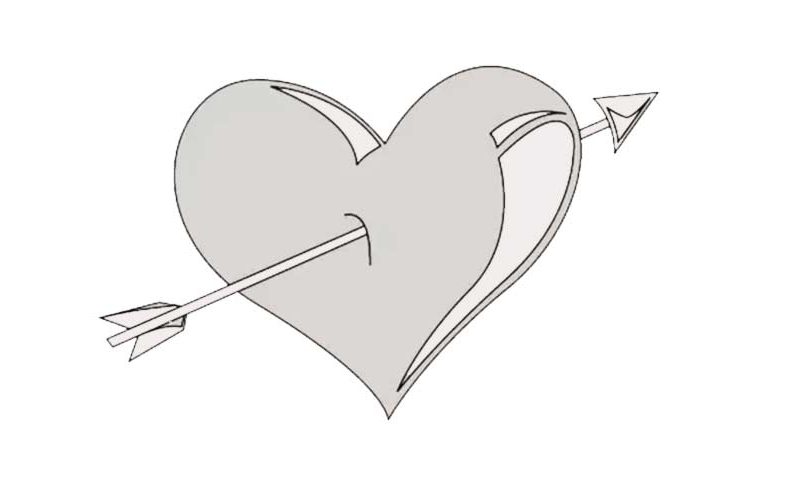
It looks exactly like a question mark and sits just a bit to the side of the middle of the paper. Don’t rush to take care of the left side yet: handle the arrow first (00 min 08 sec). It’s pretty long and narrow, just like you see in the video. The head, or, rather, the tip comes out from the other side of the heart (00 min 12 sec). Once the arrow is done, you can move on to the next stage in this how to draw a Heart tutorial – the left side (00 min 20 sec).
And don’t forget to put a tiny curve right where the arrow enters the heart to make this drawing more realistic. As for the 3D aspect, you’ll need three separate shapes inside the heart for that (00 min 28 sec). You’ve got one in the top left corner and two in the right corner. See how they give the impression that the composition “lives” in three dimensions? That’s exactly what we’re trying to achieve!
Before you learn how to draw A Heart, did you know?
This image of a heart with a huge arrow piercing through it is not new. It’s been around for centuries, and the ancient folks used it to deliver a certain message. Cupid uses his arrows to bless men and women with his love. At least that’s what the Greeks used to believe.
At the same time, this drawing could mean something like an answered love or a broken heart. It all depends on the context, and after you master this tutorial, you’ll be able to use it whichever way you want. Just don’t send it to a person that you care about!