Learn How To Draw A Cocker Spaniel Quickly & Easily
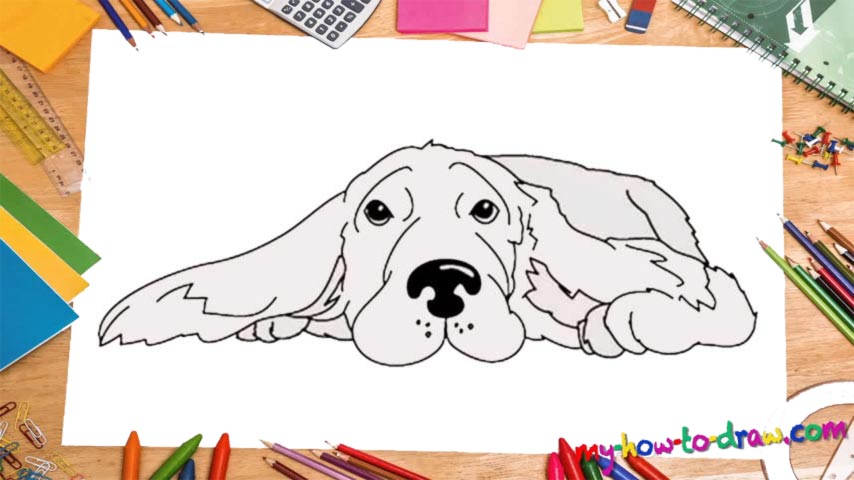
The dog’s nose looks like a perfect anchor, while the lines below it forming the mug look like a reversed heart (00 min 05 sec). Keep those images in mind while working on this how to draw a Cocker Spaniel tutorial. The eyes are tiny, and are pretty sad (or maybe it’s just that the animal is tired) (00 min 12 sec).
Once you put the pupils in, use zigzag-like lines to define the face and shape the head (00 min 16 sec). Ok, now it’s time for us to get to the body (00 min 20 sec). Use three long lines to outline the upper part and only then move on to the bottom. The ears sit at the top, on the same level as the head (00 min 25 sec). See that right leg (00 min 31 sec)? It’s right there in-your-face and it’s imperative to get the angle and size right.
This is one of the most important parts of the how to draw a Cocker Spaniel tutorial. It’s got four fingers in total (00 min 44 sec). The leg on the left is covered by the ear and the body and is mostly unseen. Follow the video guide and add all those tiny lines that help us create a realistic drawing of our dog. After you put it all in, our Spaniel will turn into quite a handsome guy (00 min 51 sec).
Before you learn how to draw A Cocker Spaniel, did you know?
As one of the funniest and cutest dog species in the world, Cocker Spaniel is also one of the most popular ones. There are two distinct breeds on Earth, and those are the American and the English breeds. The folks in the UK were the ones who bred these dogs back in the day.
The one and only purpose of this was to use them as hunters. They’ve got an incredible sense of smell and can track down the prey from miles away. As for the American Spaniels, they look a bit different and were specifically “fine-tuned” to hunt the local woodcock, among other things.