Learn How To Draw A Boxer Fast Quickly & Easily
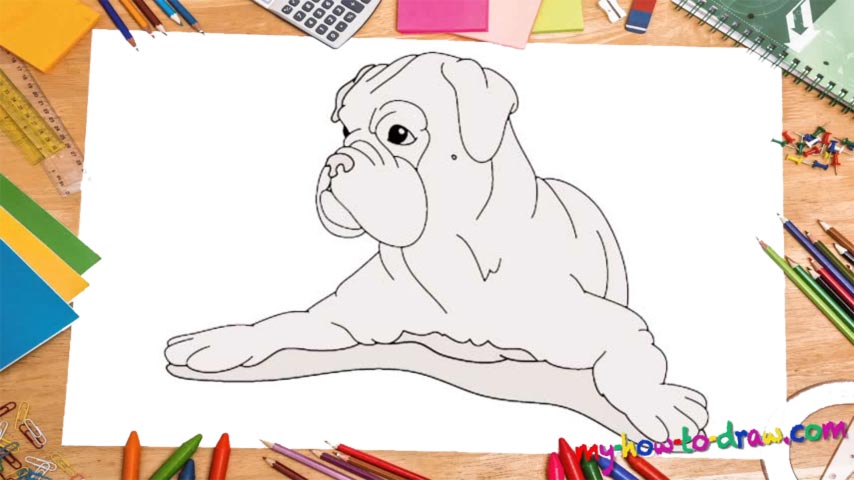
I like to start my drawings with the nose and the mug, as it gives me the much-needed perspective to keep the proportions right (00 min 05 sec). After you add the curves for the mouth and the lower jaw, it will look like a human heart (00 min 12 sec). The eyes sit right above it and you should go ahead and color them right now (00 min 16 sec). Happy with the intro to this how to draw a Boxer Fast tutorial?
Alright, let’s proceed with it then! To help yourself out with the sizes and the position of the various elements, create a simple line on the left for its head and a V-like curve for the ear on the right (00 min 25 sec). Once those are in place, it will be much easier to complete the upper half of the dog’s head (00 min 32 sec). The left ear is almost out of our sight; but still, go ahead and add it for a realistic picture.
It’s time to move on to the next step in this how to draw a Boxer Fast tutorial – the body (00 min 40 sec). It’s got both of its front legs spread out in a relaxed manner, and that makes our job that much easier. Begin with some basic lines for the neck and gradually move down to complete the body (00 min 45 sec). At this point, you might think that the head is too big, but it’s actually not. After you draw the legs, everything will fall into place (01 min 00 sec).
Before you learn how to draw A Boxer Fast, did you know?
Born and bred in Germany, these mighty dogs aren’t to be messed with. The medium size and those strong legs allow them to be super-fast and flexible, capable of hunting down even the agilest prey. That is exactly why the hunters love and respect the boxers.
Thanks to those powerful jaws, these predators can hang on to a much bigger animal until they give up. As for the very first club dedicated to these marvelous dogs, it was established back in 1895, more than 120 years ago. To this day, boxers are extremely popular!